Are you responsible for publishing posts regularly on different social media networks? Then you have come to the right place.
In this guide, you’ll learn how to create and schedule posts with Fanpage Karma and have them approved by your team. Let’s get started!
(Click on the screenshots to enlarge them.)
1. Create, Approve & Publish Posts
You can find the publisher under Publish in the main navigation. To create a new post, do the following:
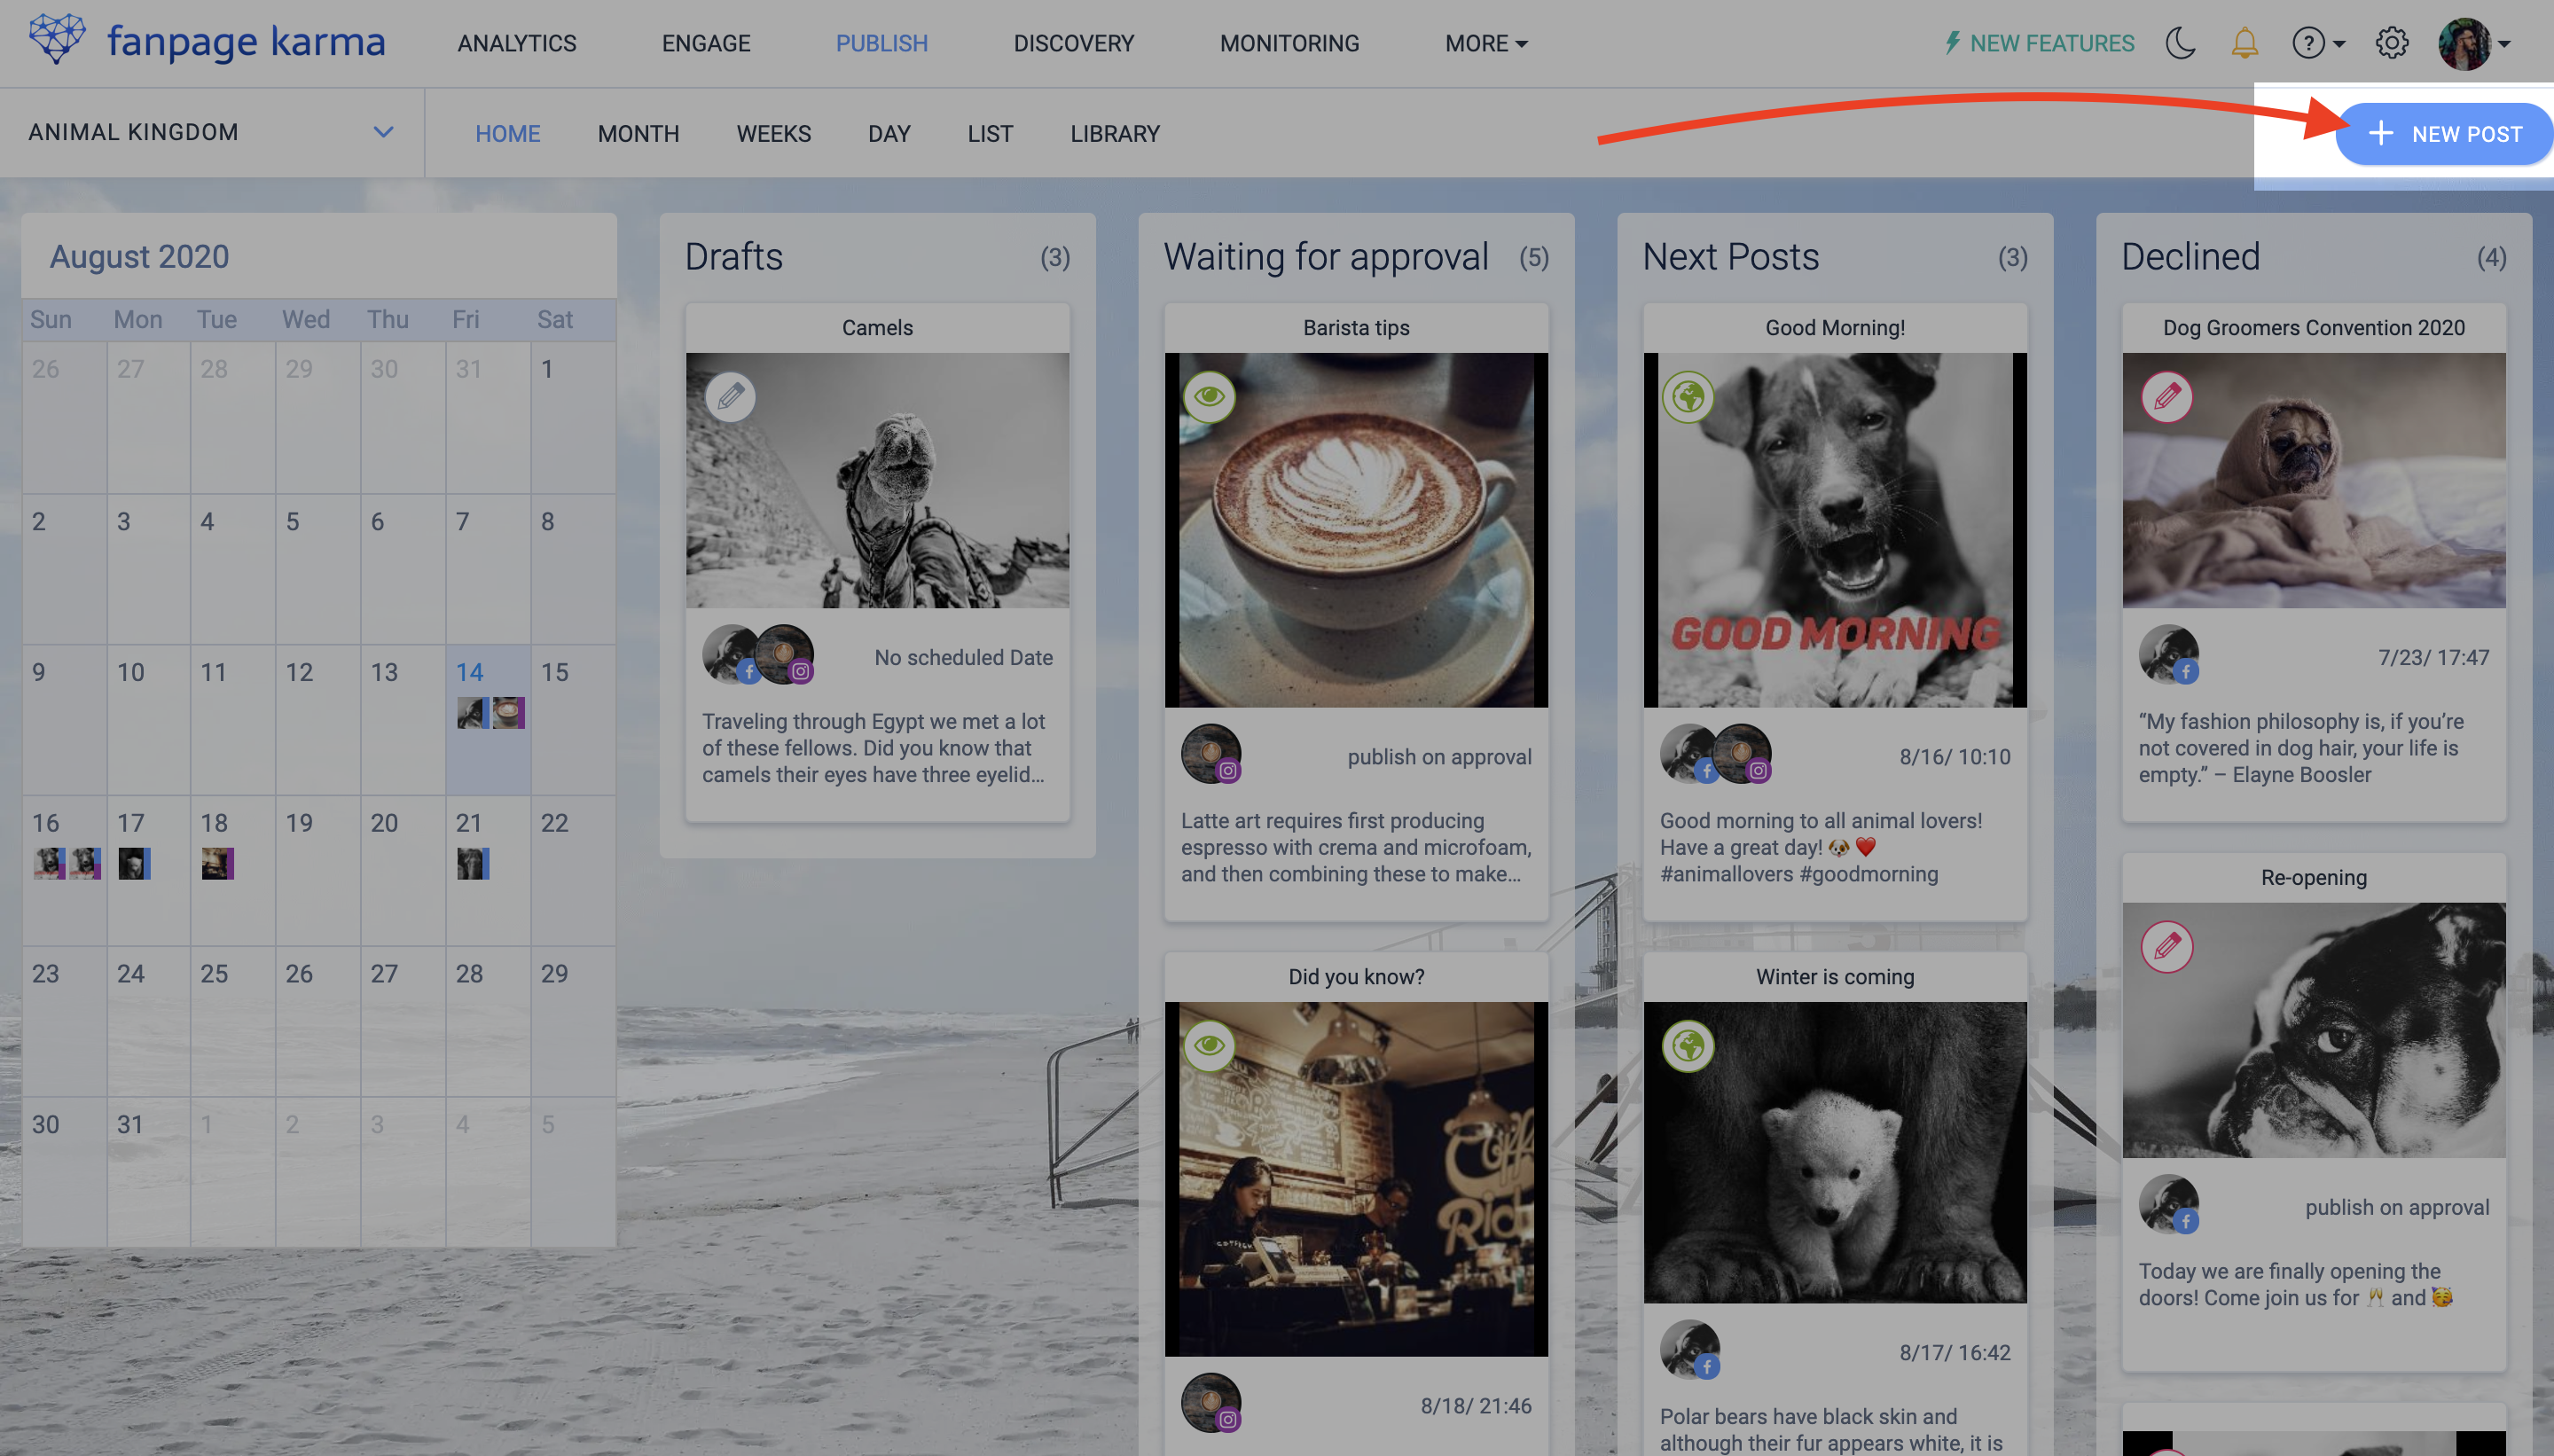
1.Click “+ New Post” in the upper right corner
2. Select the profiles you want to post on under “Add profiles”
3. Select a date and time of publication under “Set date and time”
4. Enter a caption into the input field
5. Choose an image, video or GIF for the post by clicking on the field with the “+”
6. Optional: Use the image editor to customize images (crop, filter, insert text, etc.)
7. Repeat the process for all profiles (you switch between the designs by clicking on the network tabs above the post text)

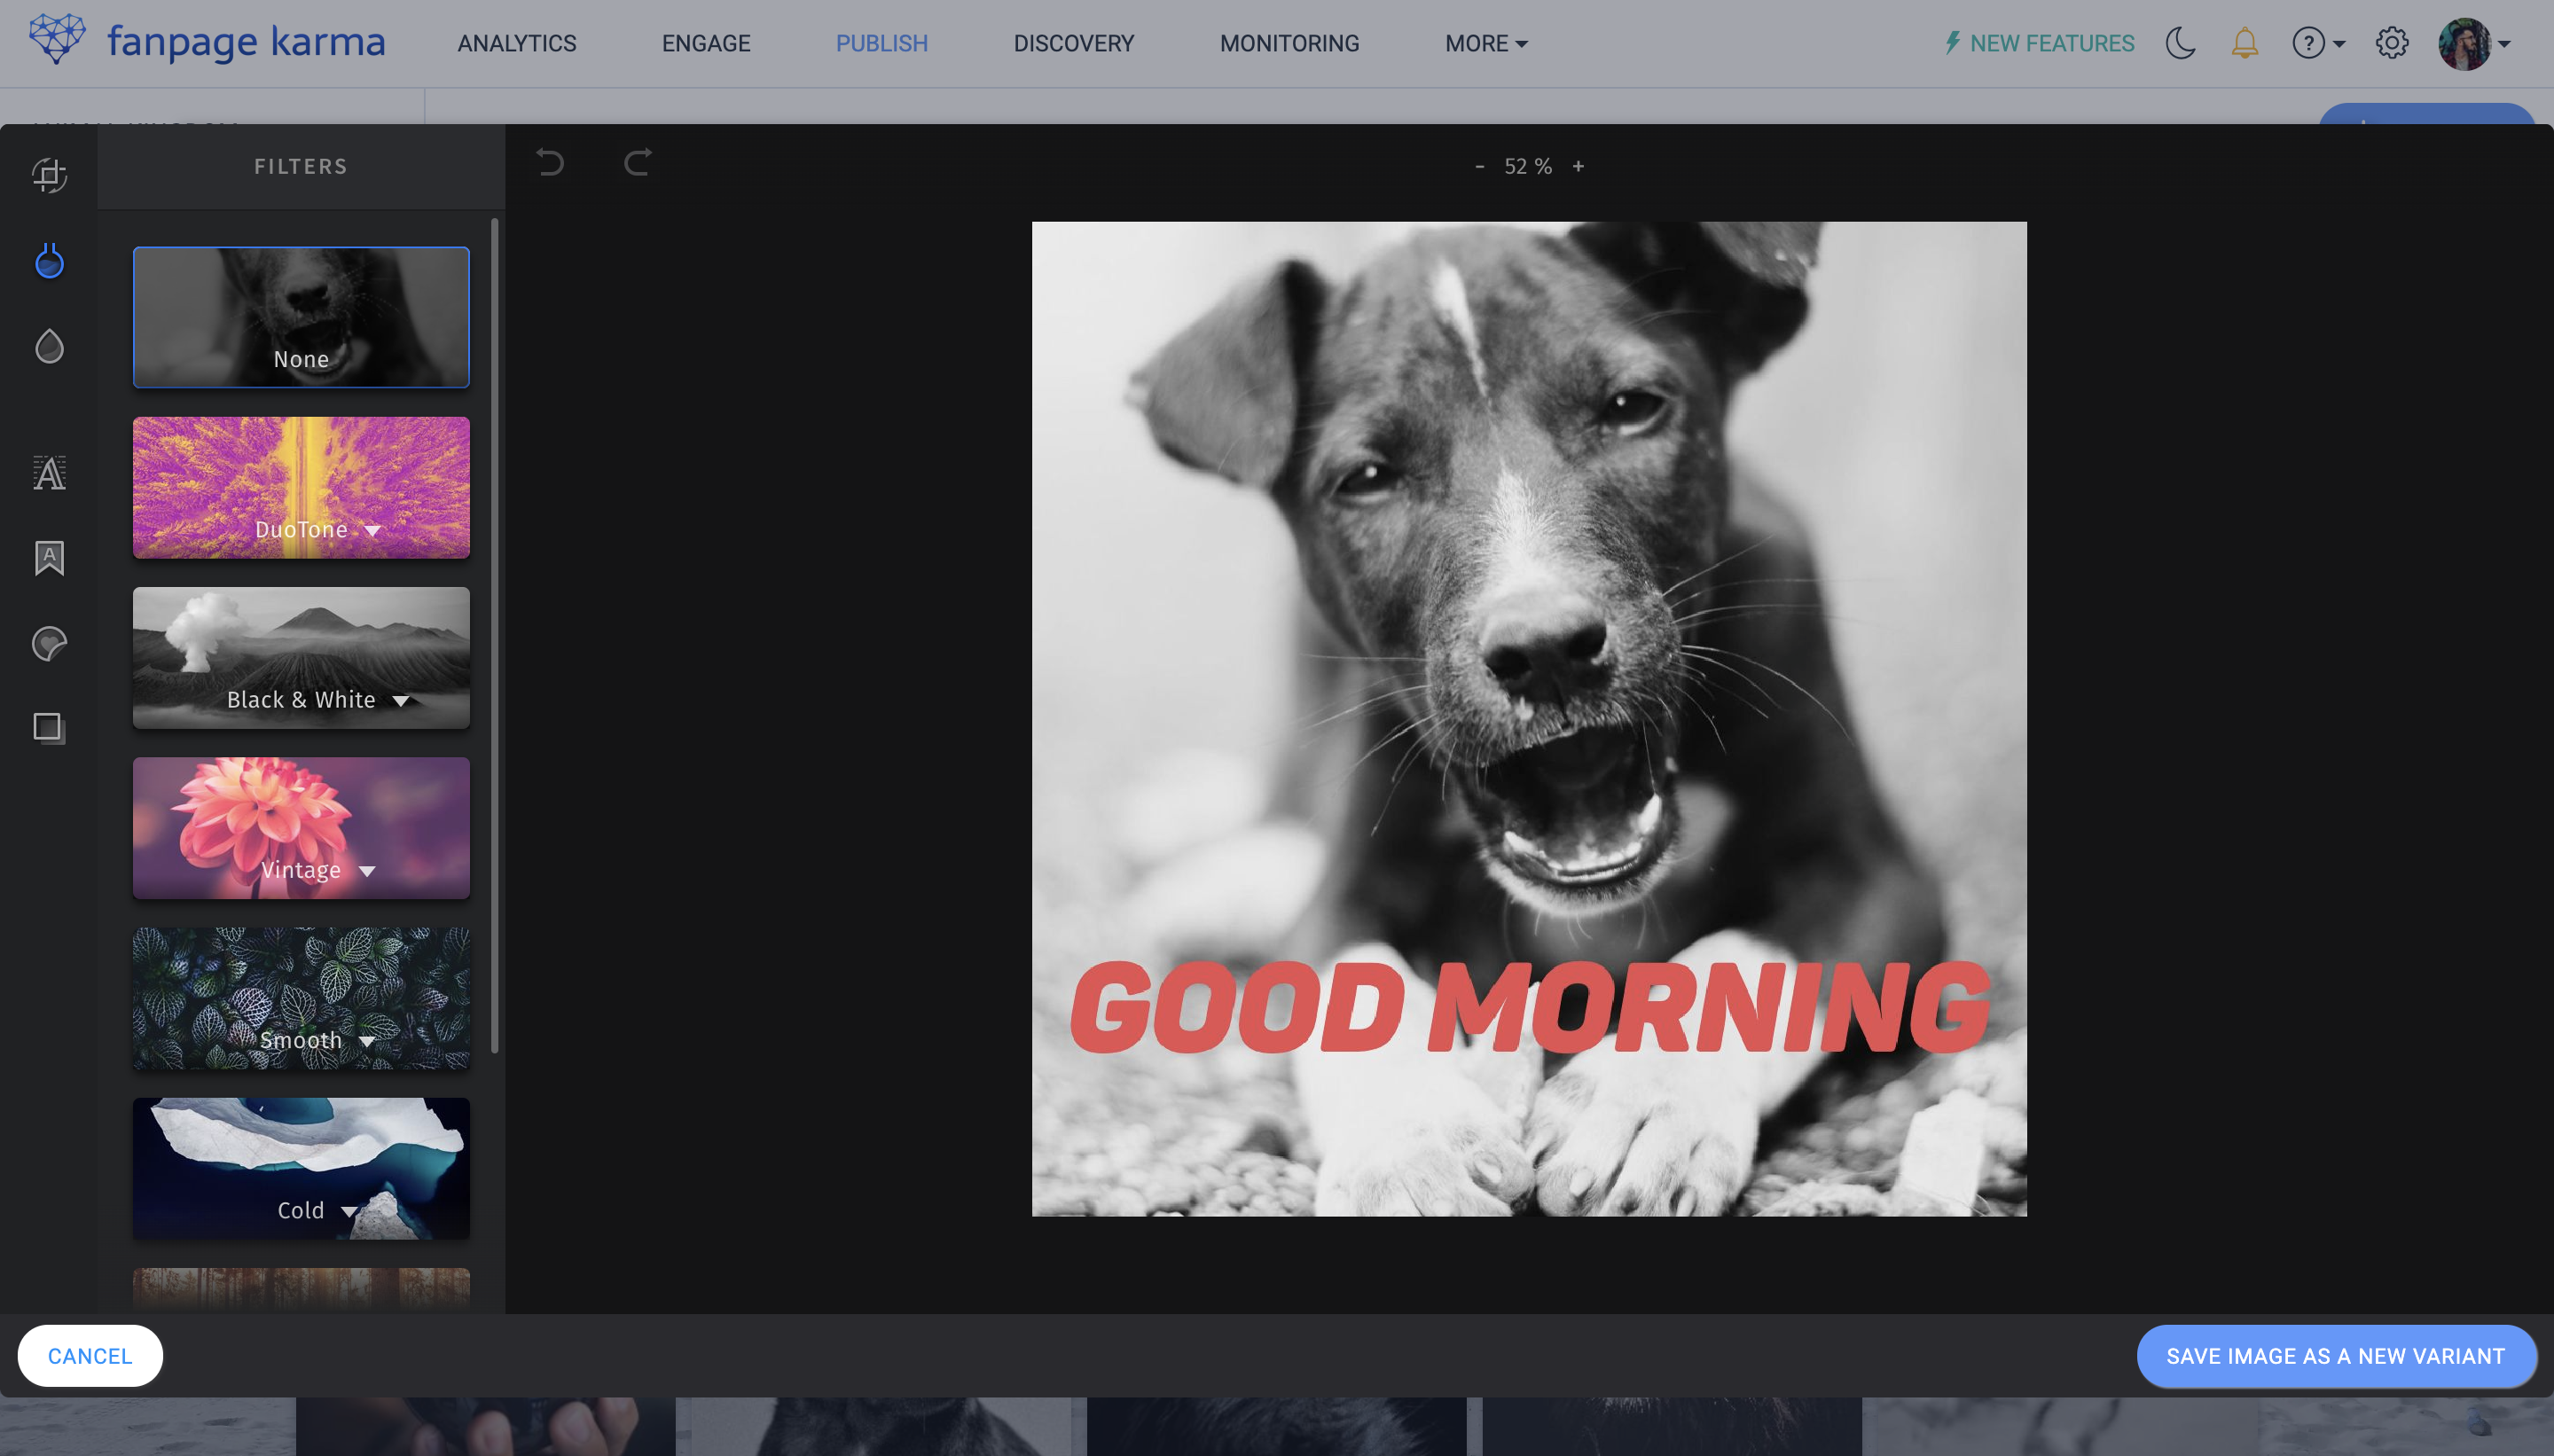
Editing Images
Is your graphic designer too busy right now? No problem. The image editor makes it easy to crop images to the right network formats, apply filters or add text and stickers.
- Open post draft
- Add an image
- Open the image editor with a click on the small pen that appears when you move the mouse over the image
- Edit the picture until it pleases you
- Click “Save image as new variant”
- Click “Add”
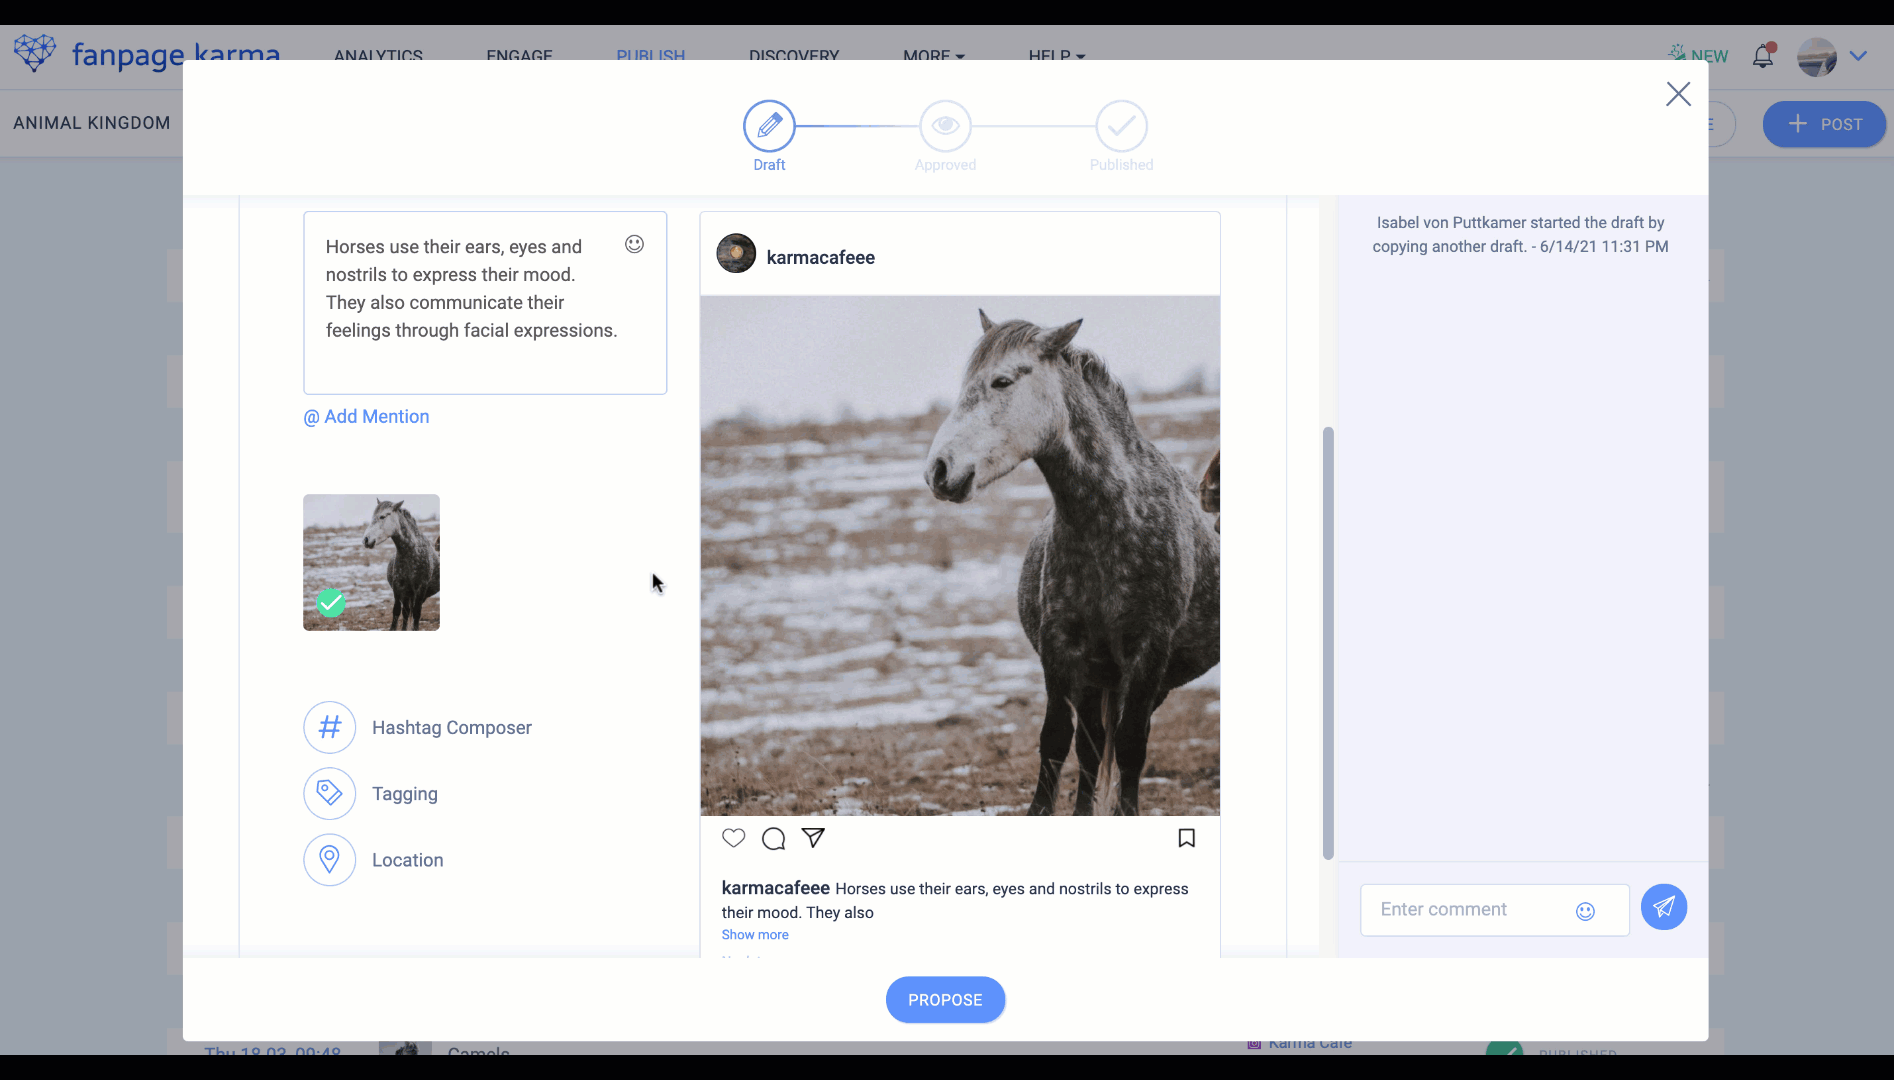
When the draft is finished, you can initiate the approval process.
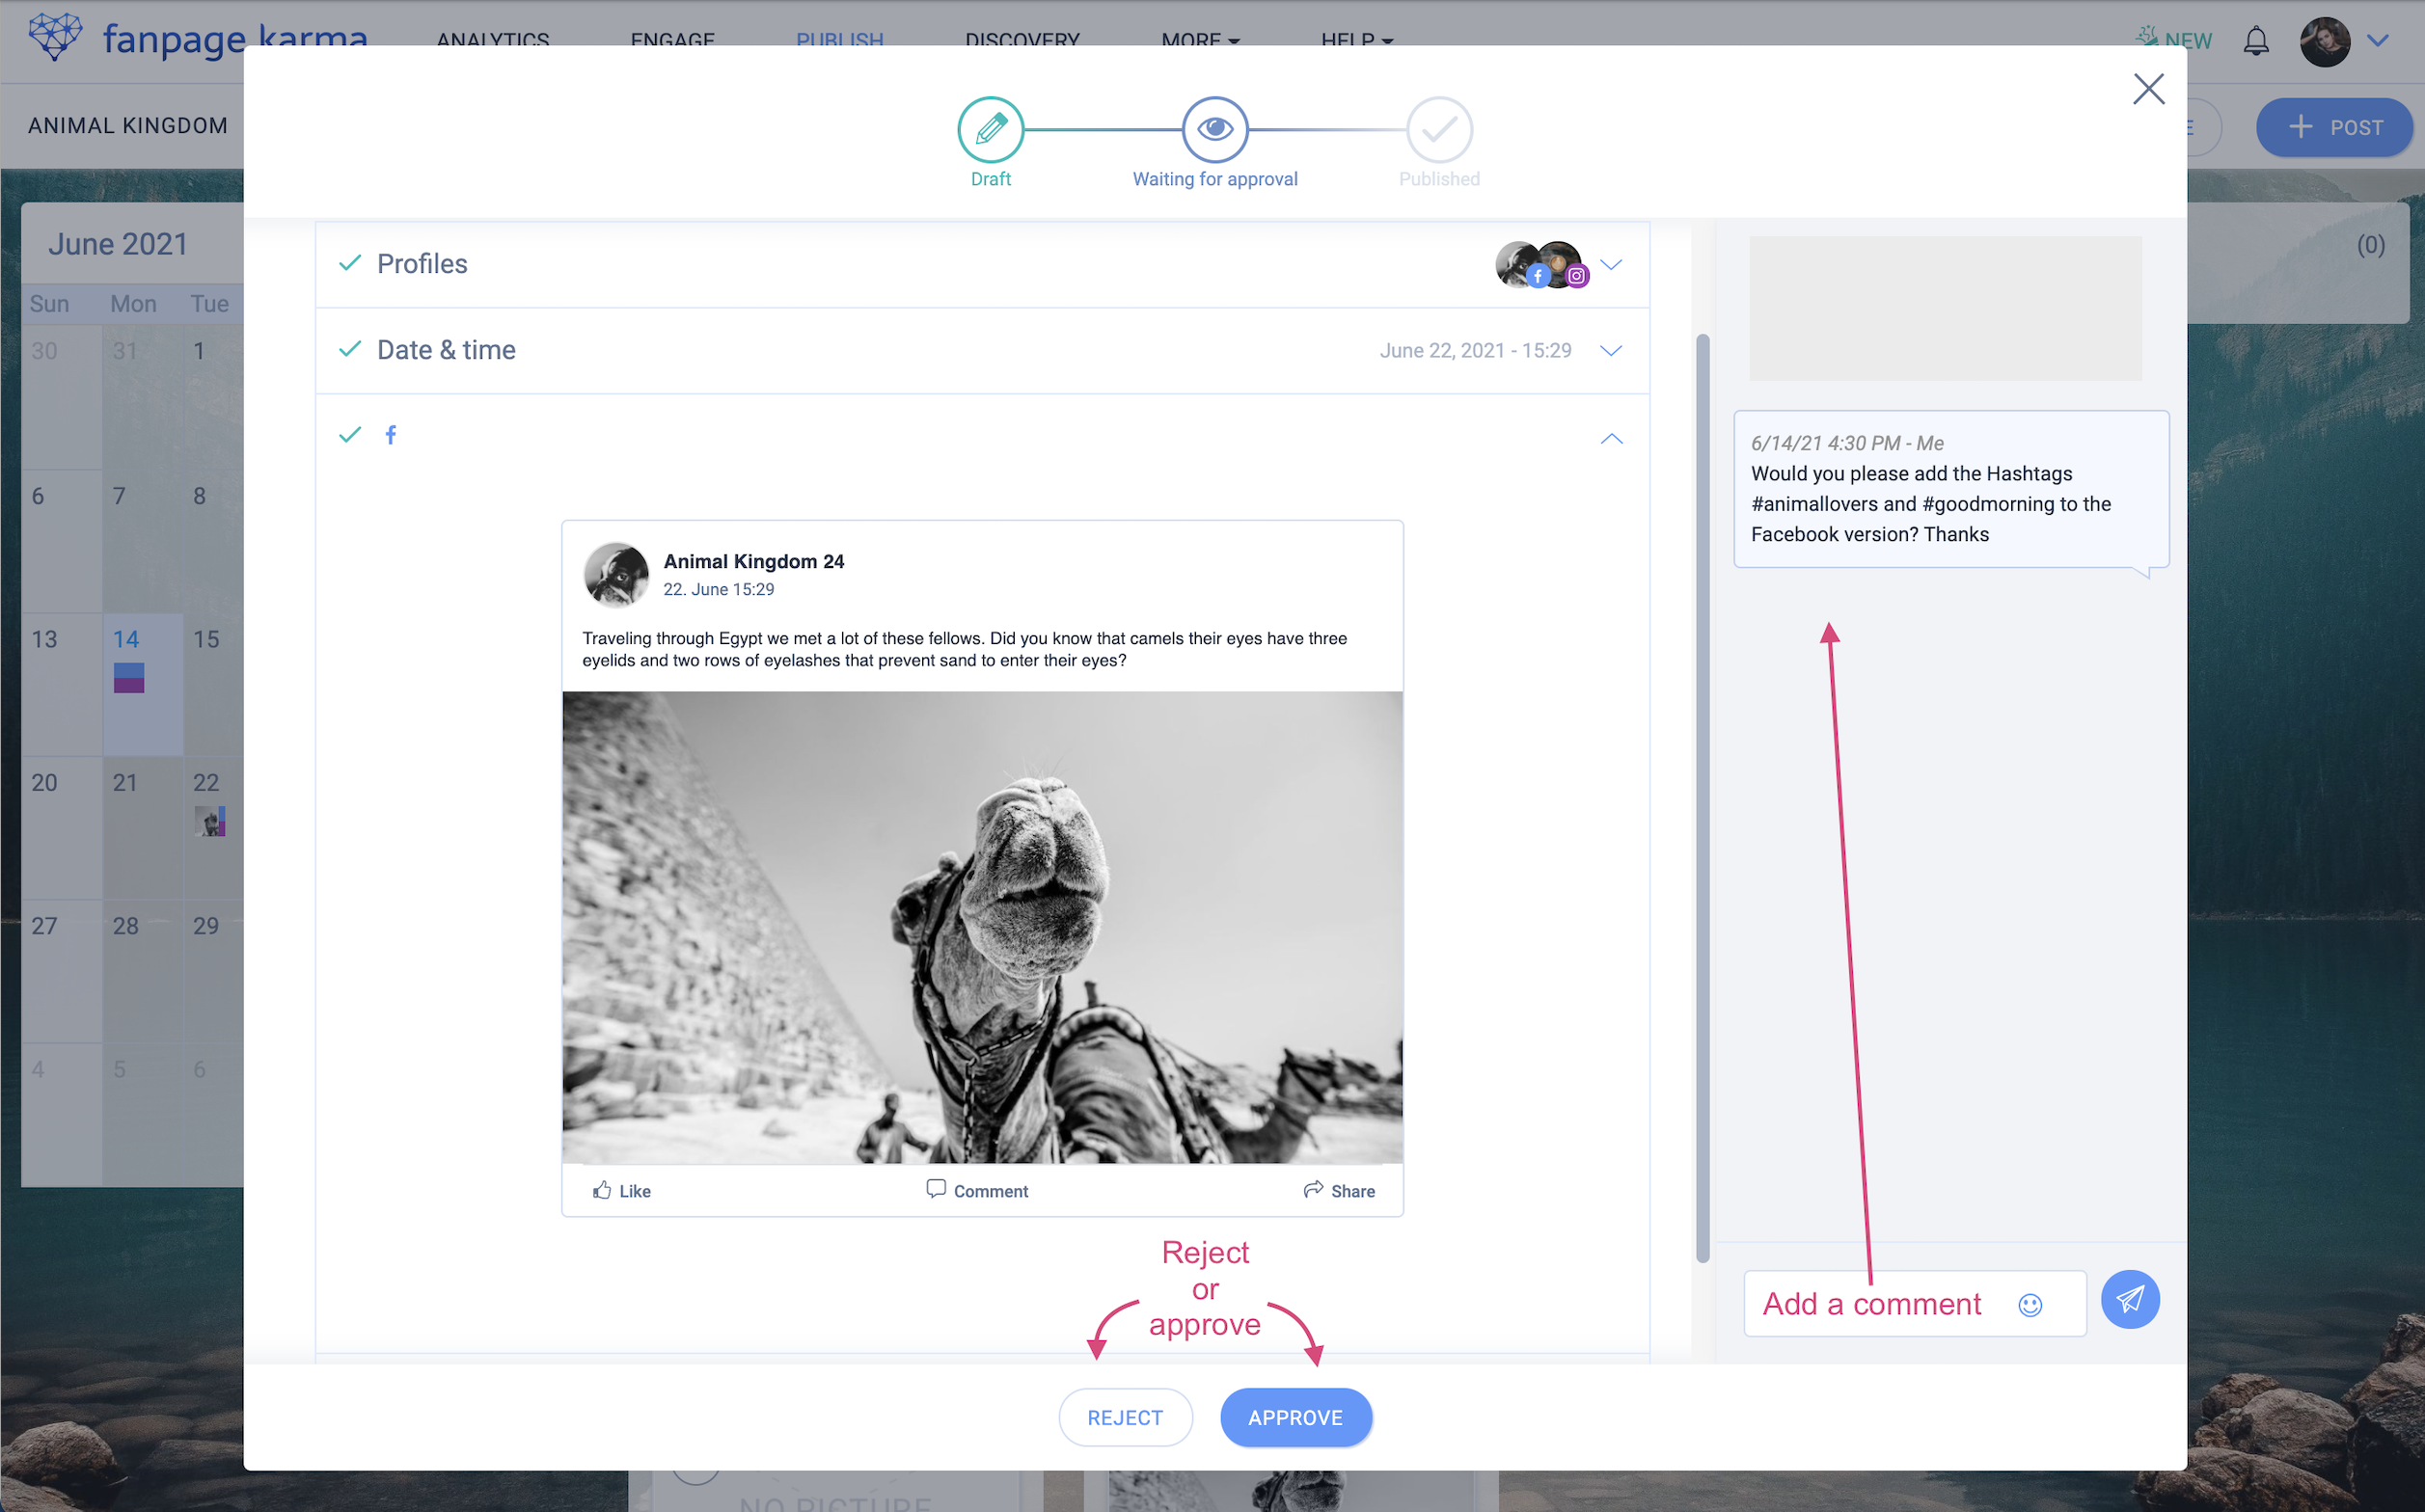
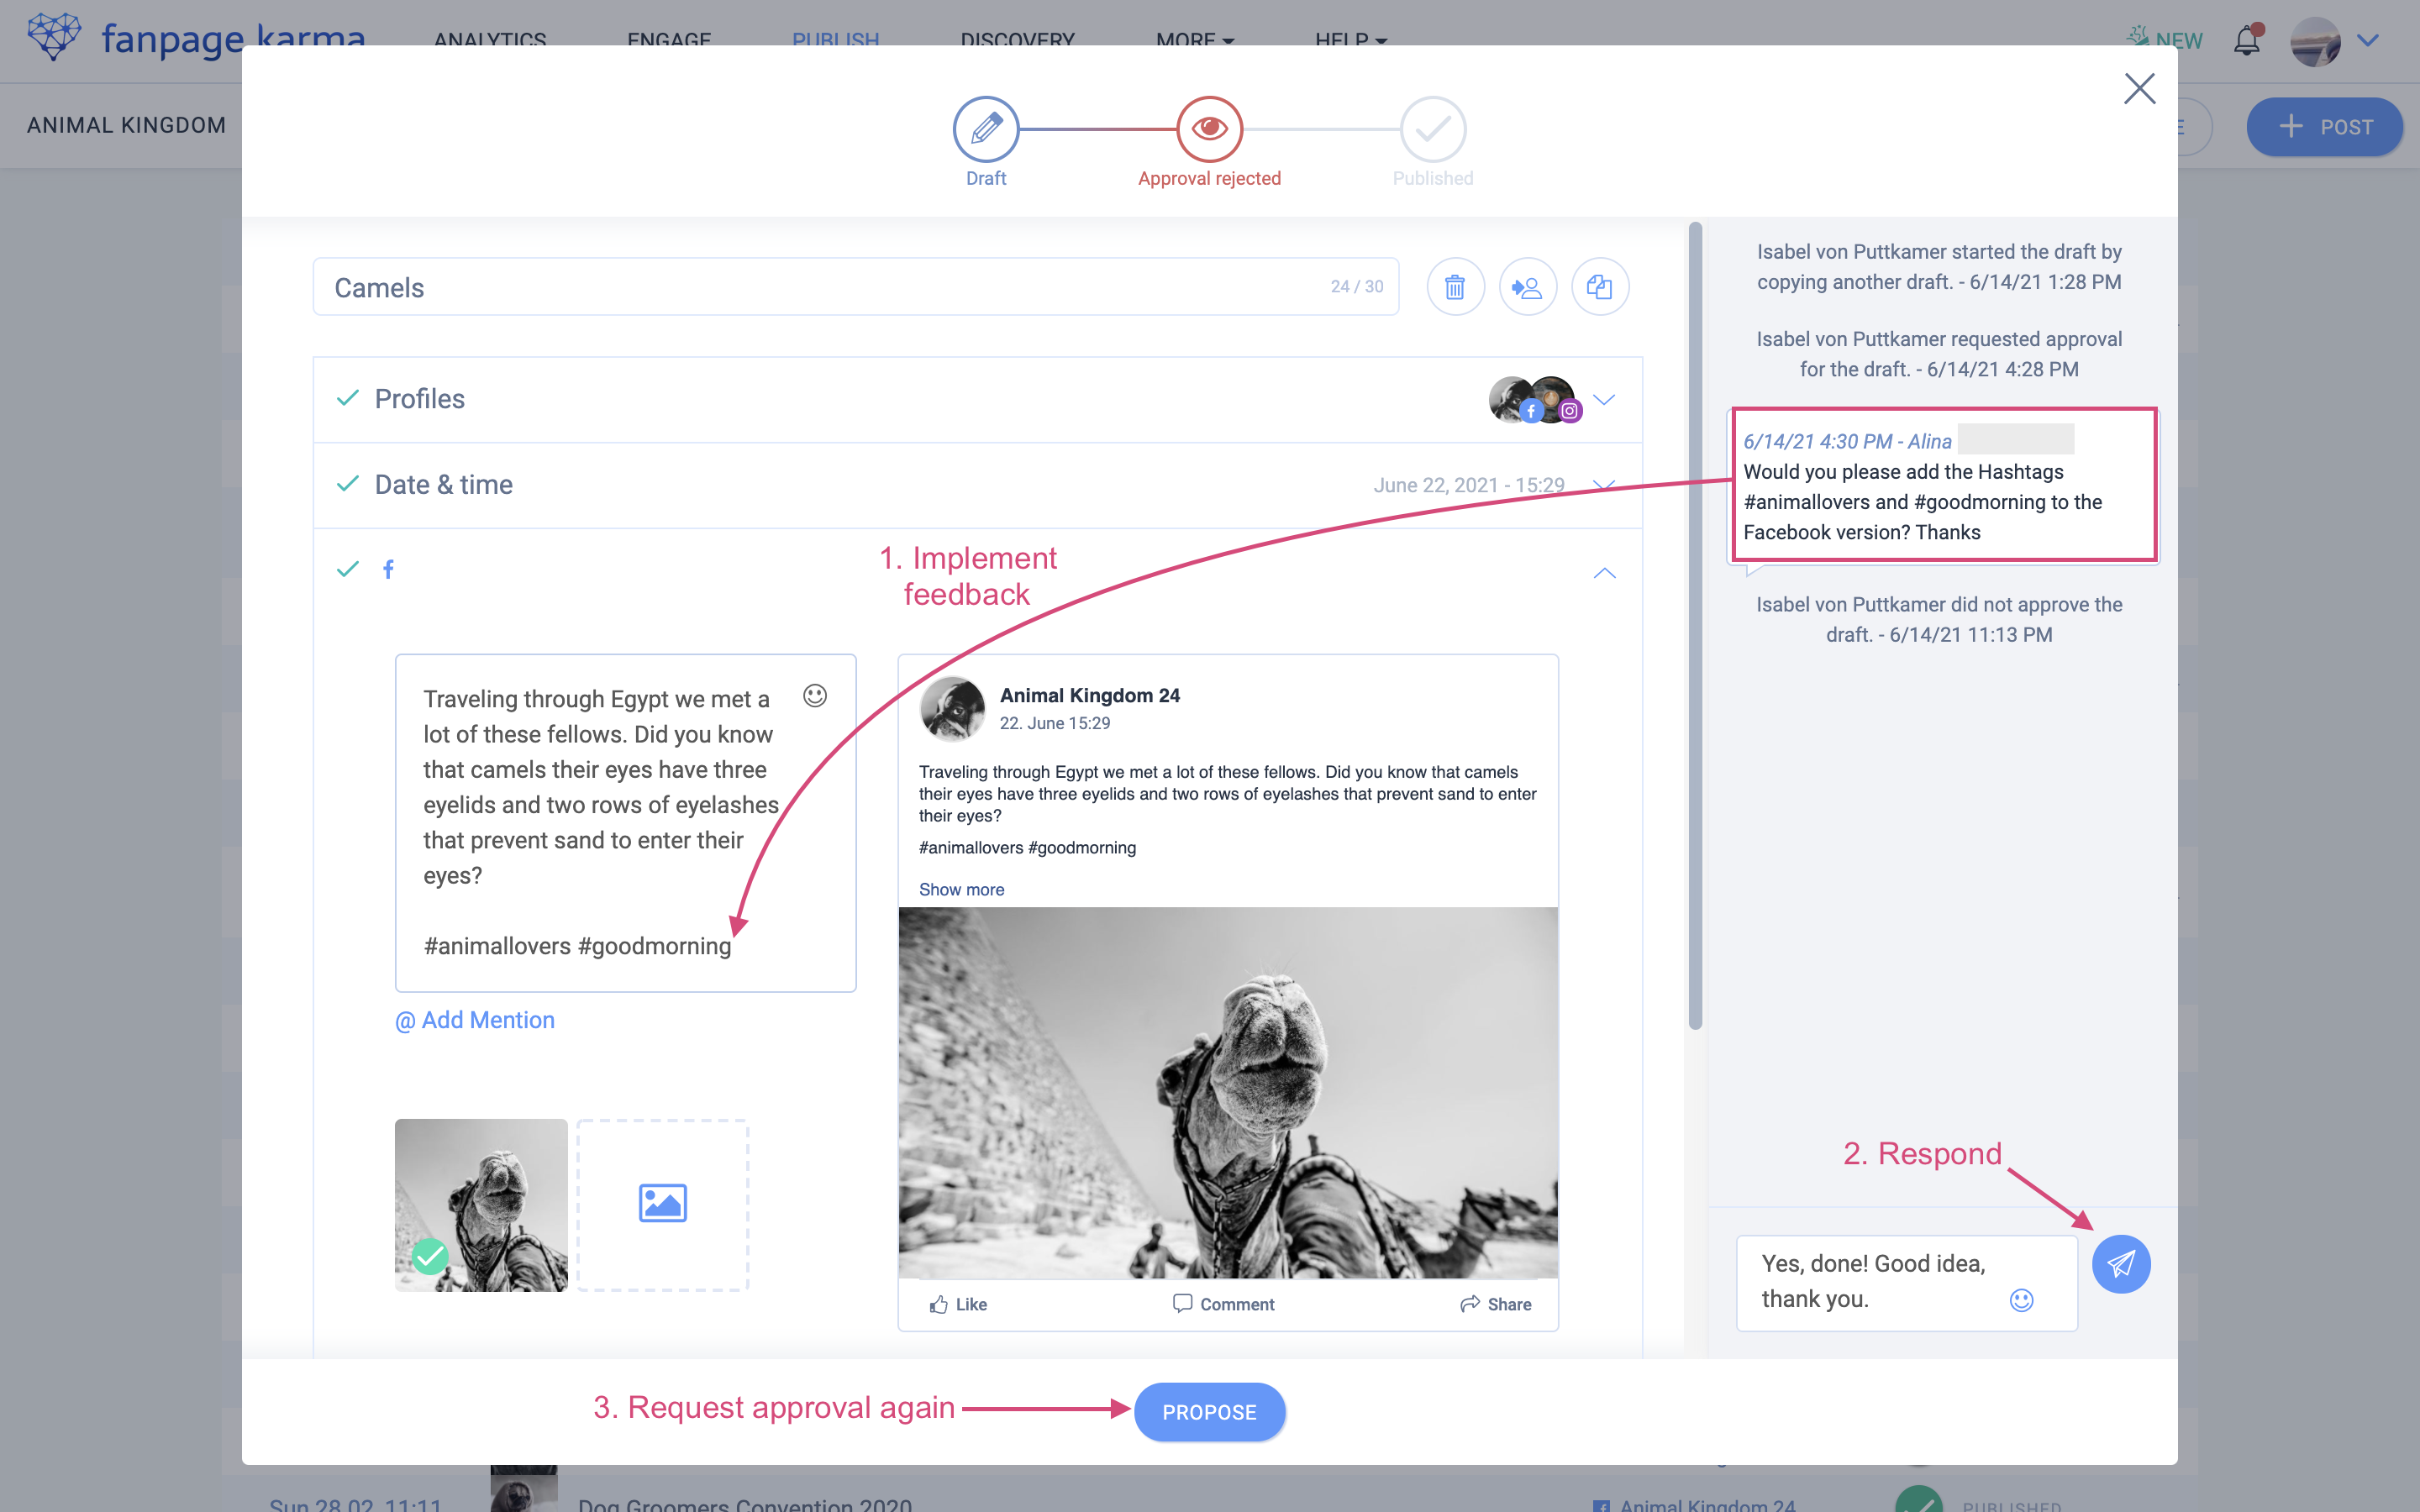
Approval Process
The approval process allows post drafts to be reviewed and commented by decision makers so that inconsistencies can be corrected and no faulty posts are published.
- Click on “Propose”
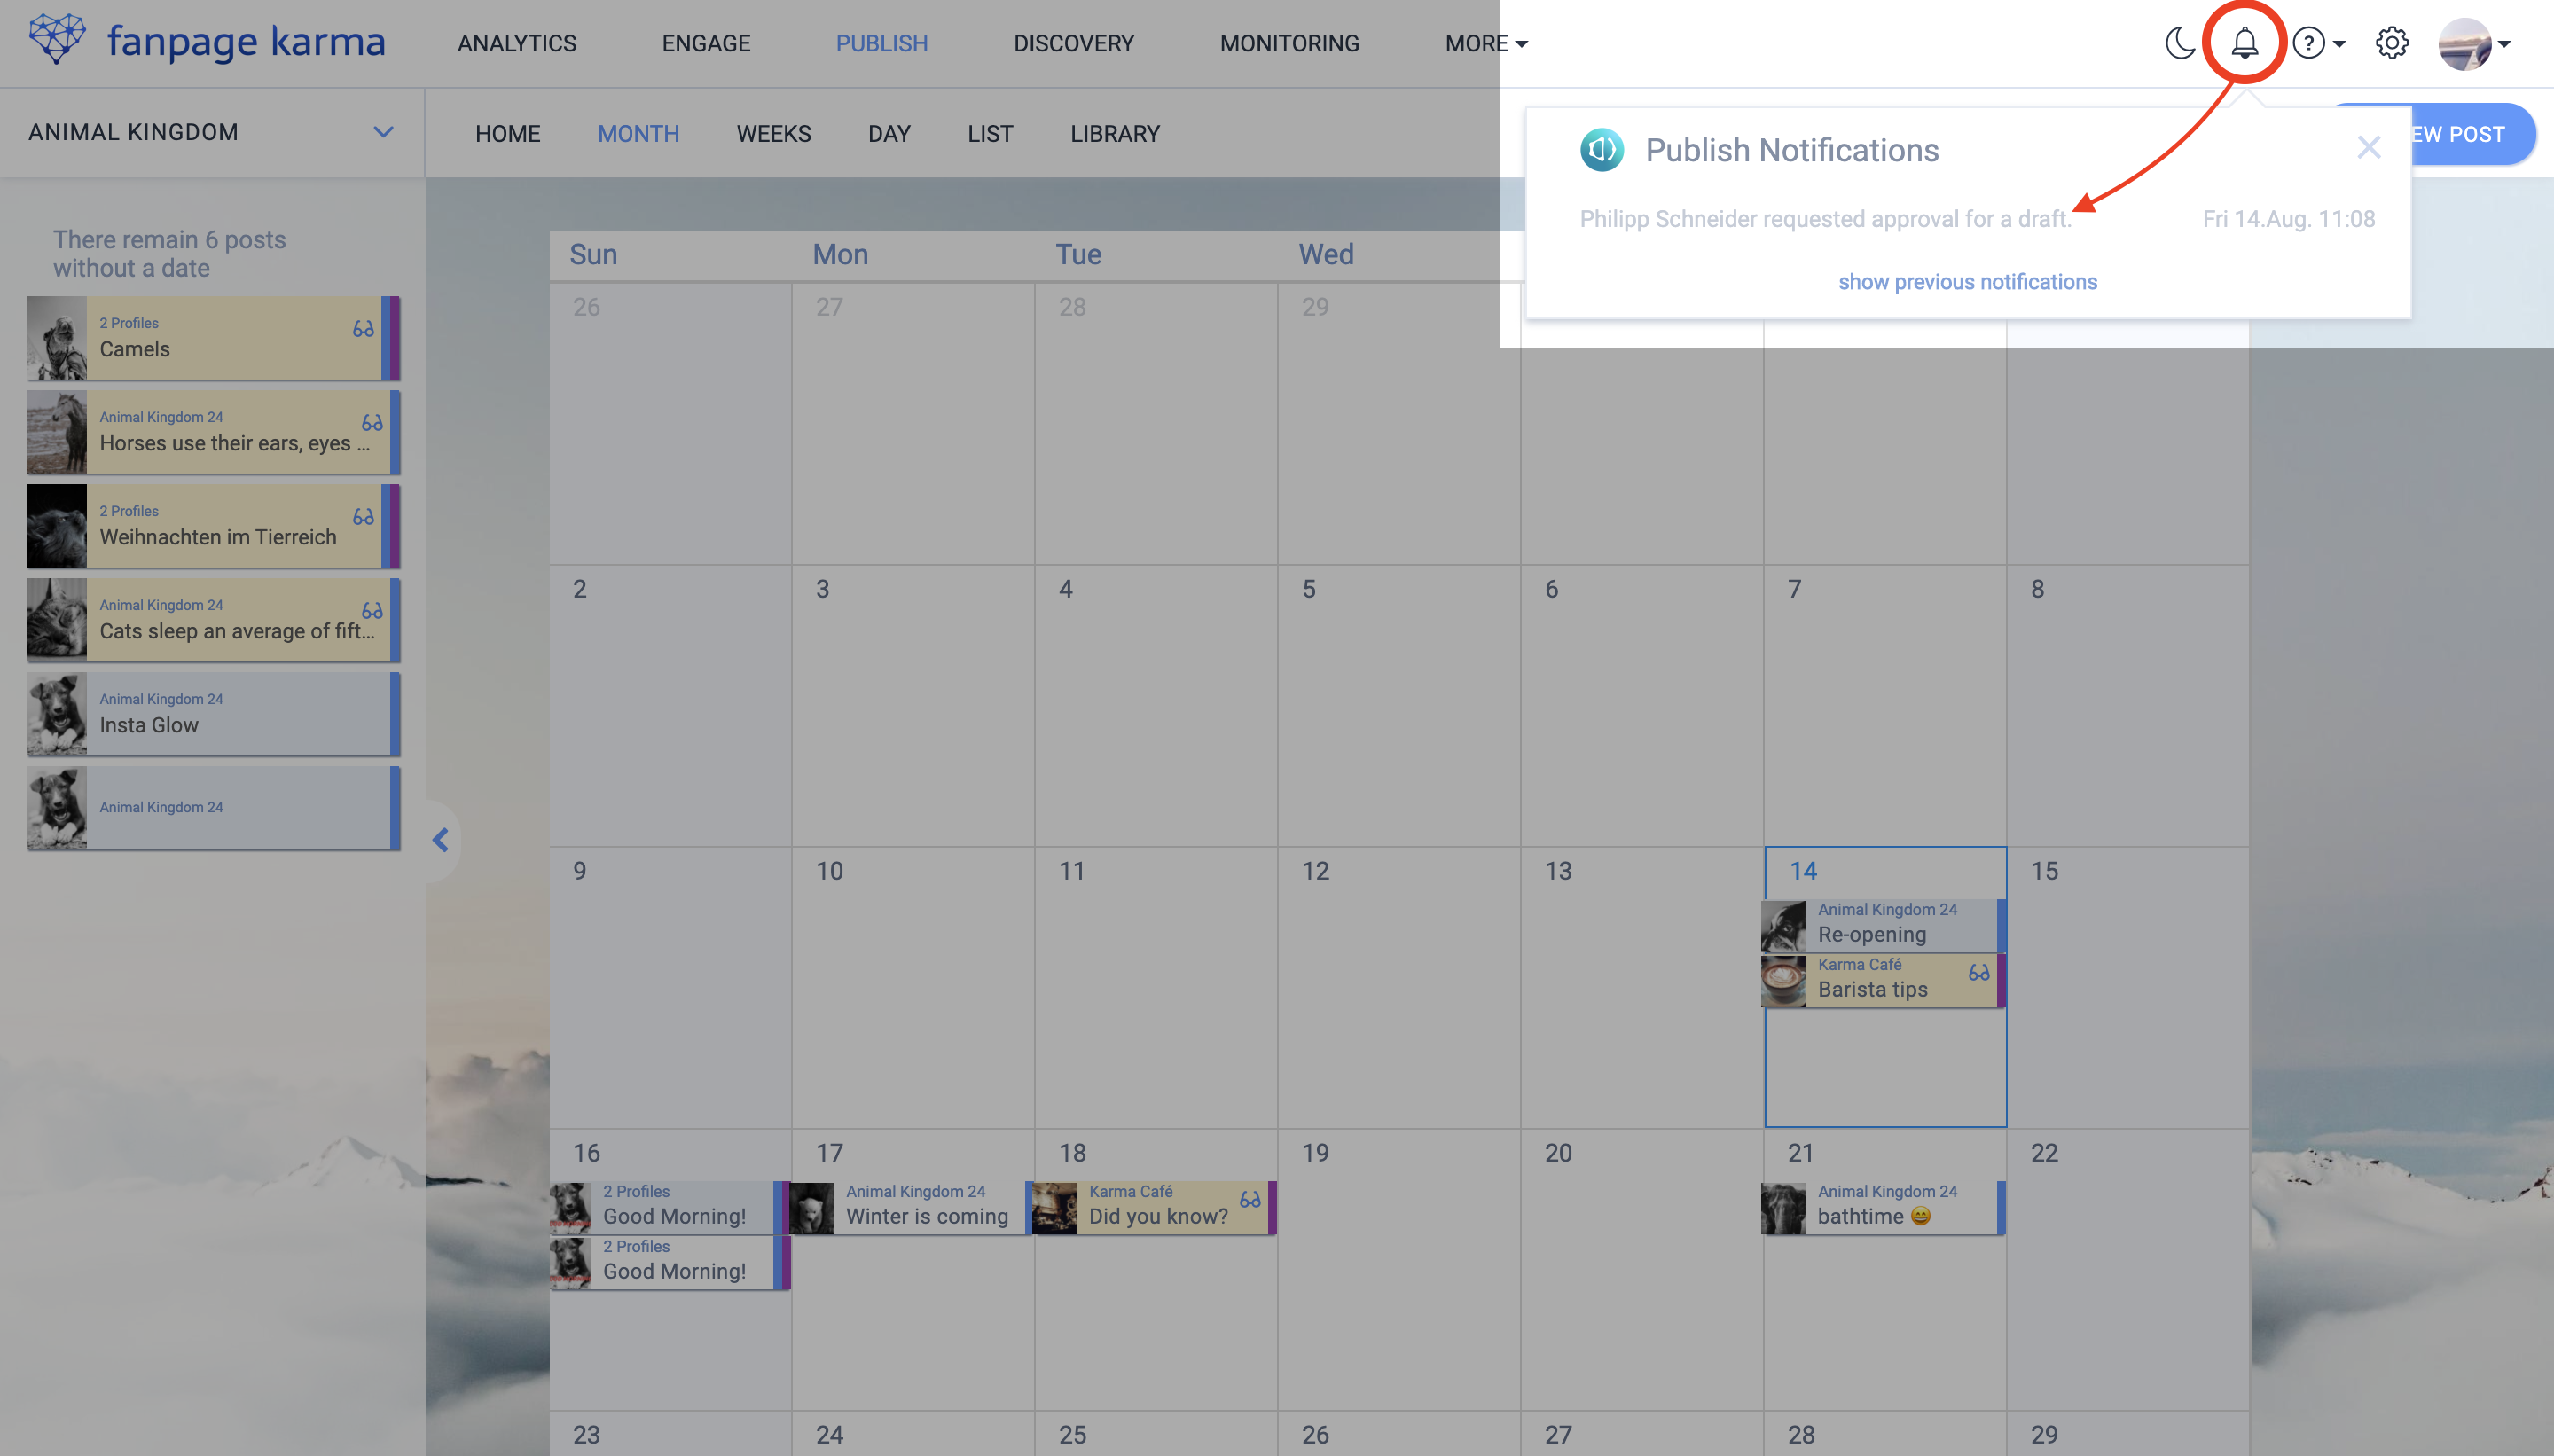
2. Your editor will receive a notification under the bell icon in the top right corner of the navigation bar. They have to click on it.
3. If an error is found, the editor leaves a comment and clicks the red “Reject” button
4. A notification appears under your bell that a post has been rejected, click on it
5. Implement the feedback
6. Click on “Propose” again
7. The editor clicks “Approve”
The post will now be published on the chosen date automatically.
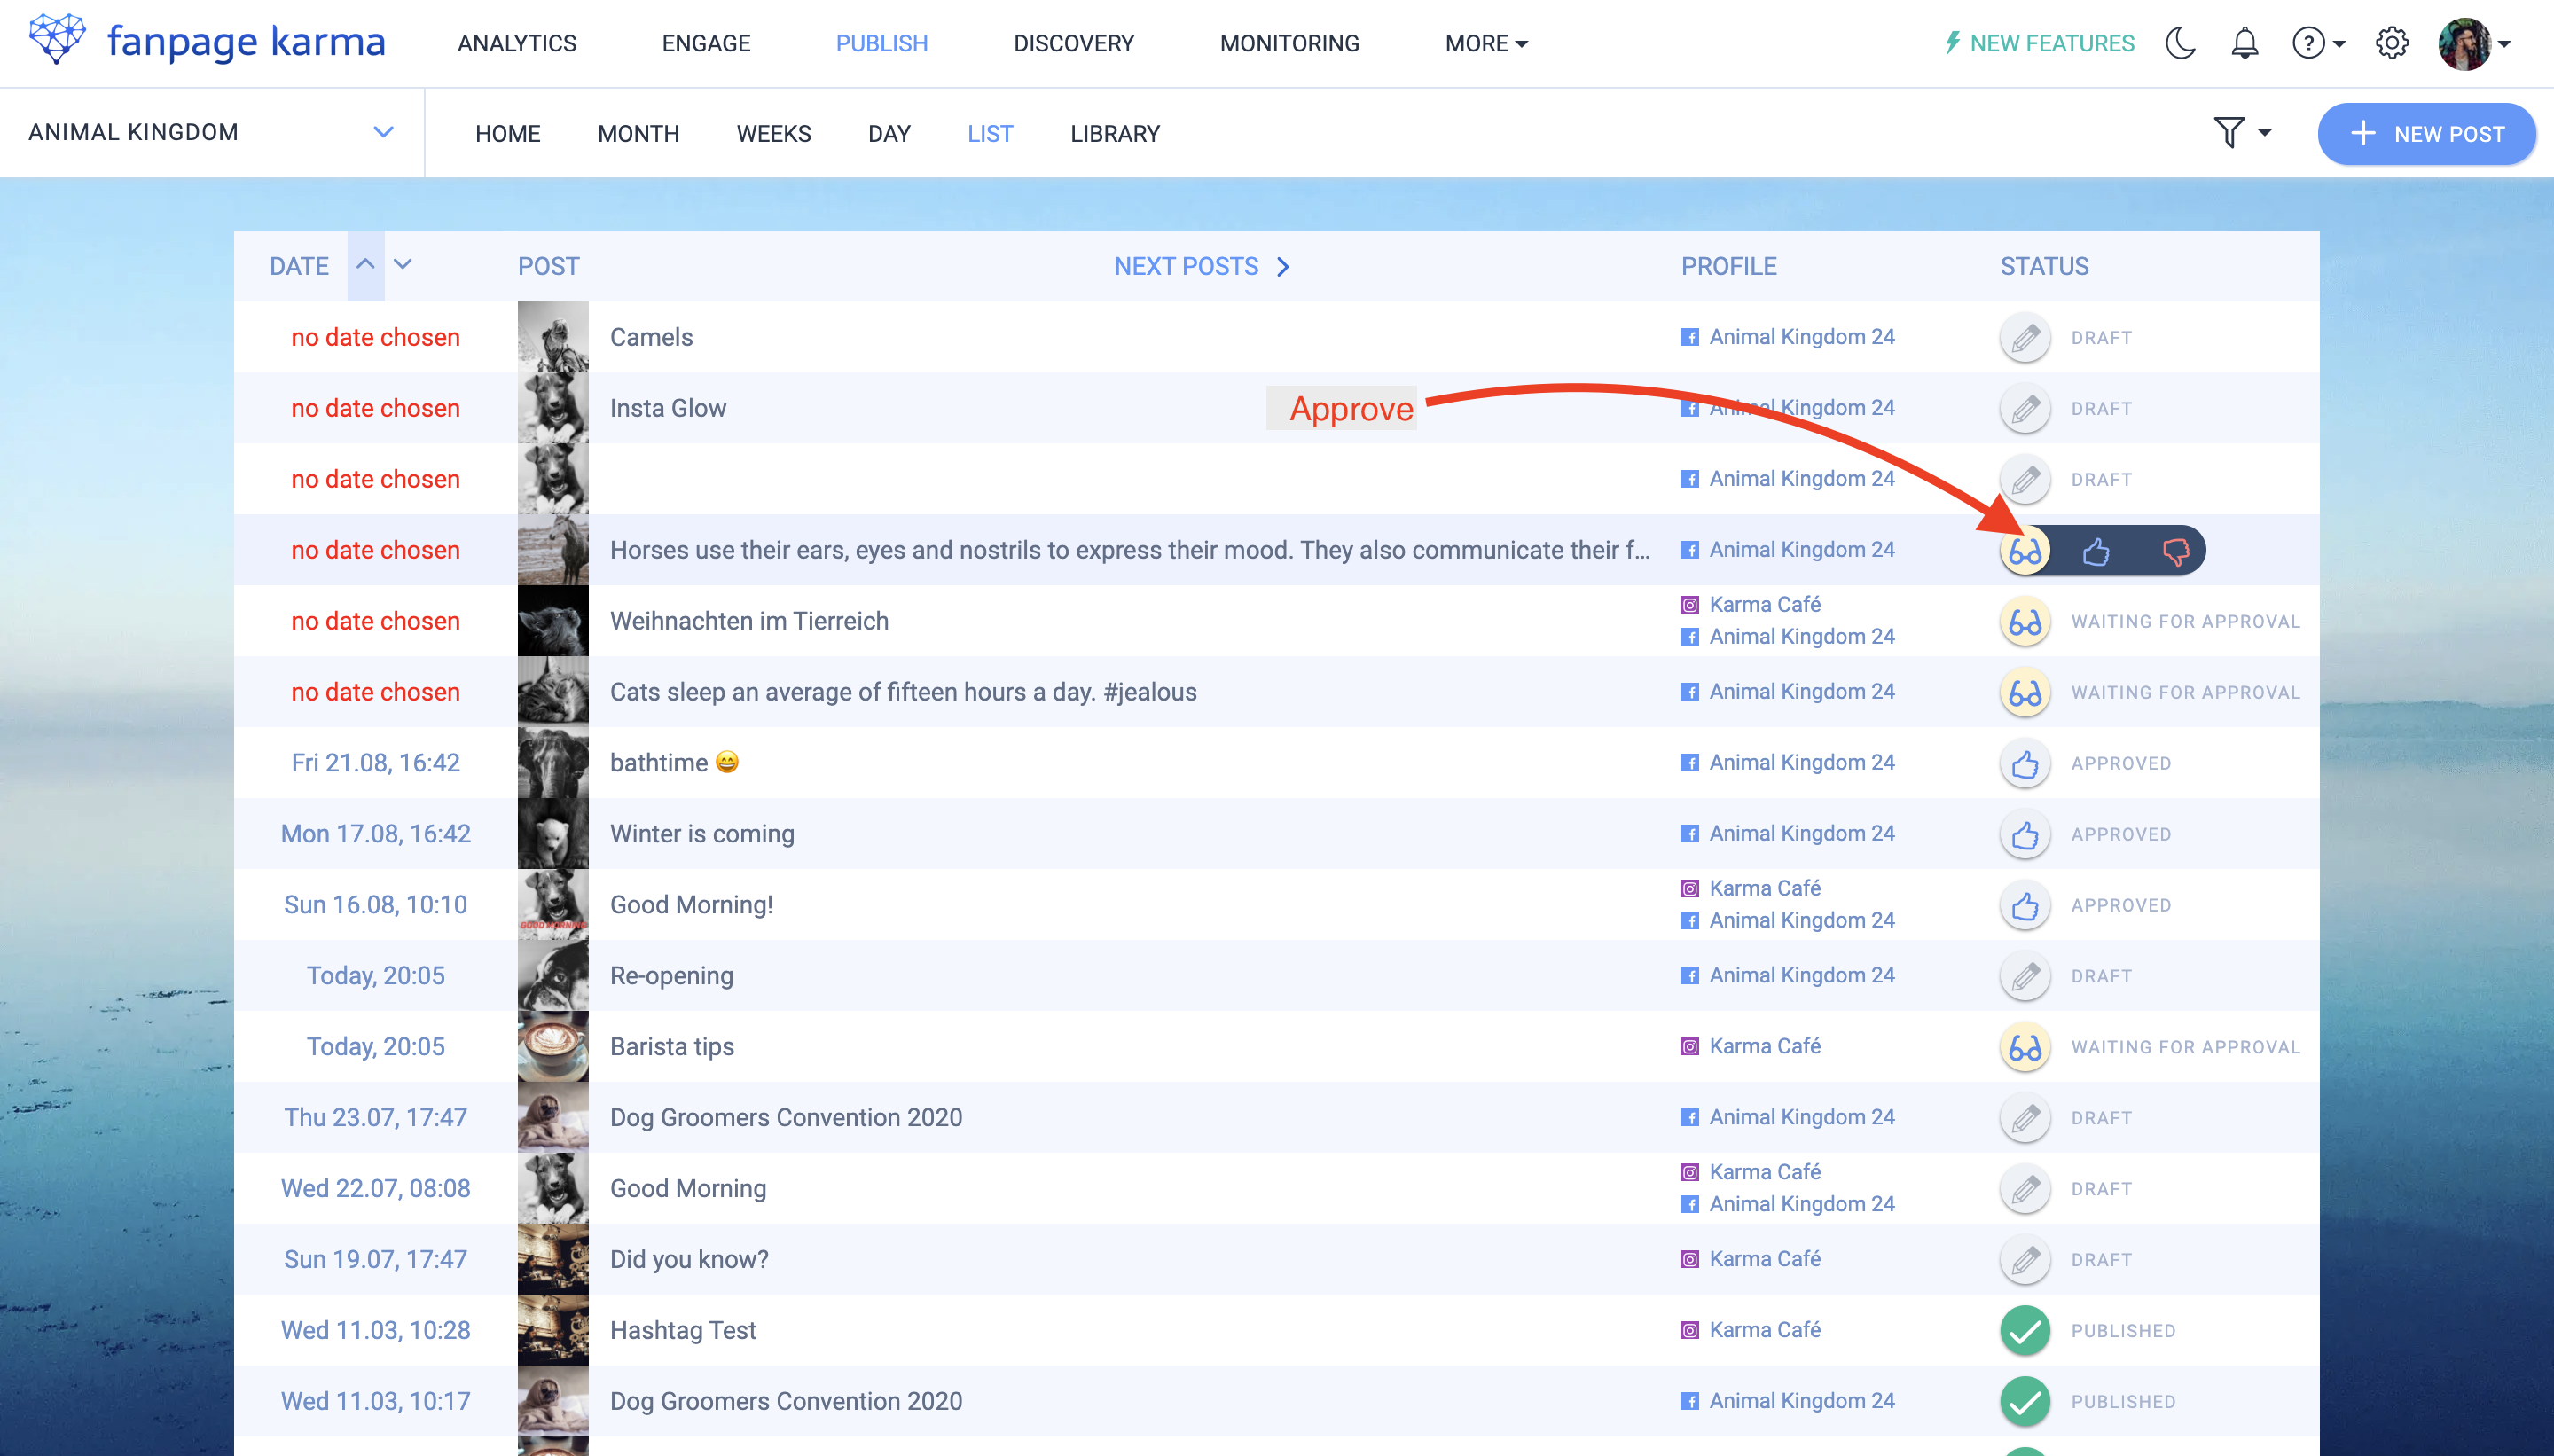
Flying Solo?
- Click “Approve”
- Switch to start screen
- Choose post in column “Waiting for approval”
- Click “Approve myself” and confirm
- The post will now be published at the chosen time automatically.
Tip: The start screen gives you a great overview of the approval status of planned posts. There is a column for drafts, posts waiting to be approved, approved posts and rejected posts. Alternatively, you can use the daily, weekly or monthly calendar to get a chronological overview of the planned posts.


Tip: The list is a great view to see all posts at a glance. From here, you can directly approve or reject posts without having to open them all separately. That saves time!
2. Find Relevant Hashtags
Since hashtags are a part of every Instagram post, there is a hashtag composer in the Instagram post draft, which allows you to insert relevant hashtags at lightning speed.
- Click on the hashtag icon below the post image
- Choose a hashtag that fits your niche
- Select hashtags from the hashtag suggestions by clicking or …
- Click “Choose hashtags automatically” to automatically select the 30 most relevant hashtags
- Click “Add”
The hashtags now appear in the post draft at the end of the caption.
3. Request External Feedback
If you want to discuss posts with people who are not using the tool, you need to use the feedback feature.
Let’s assume that the decision maker for post releases does not use Fanpage Karma himself and therefore cannot access post drafts just like that. Using the feedback feature, you can send them a preview of the post and they can give you approval or leave other comments. You do this as follows:
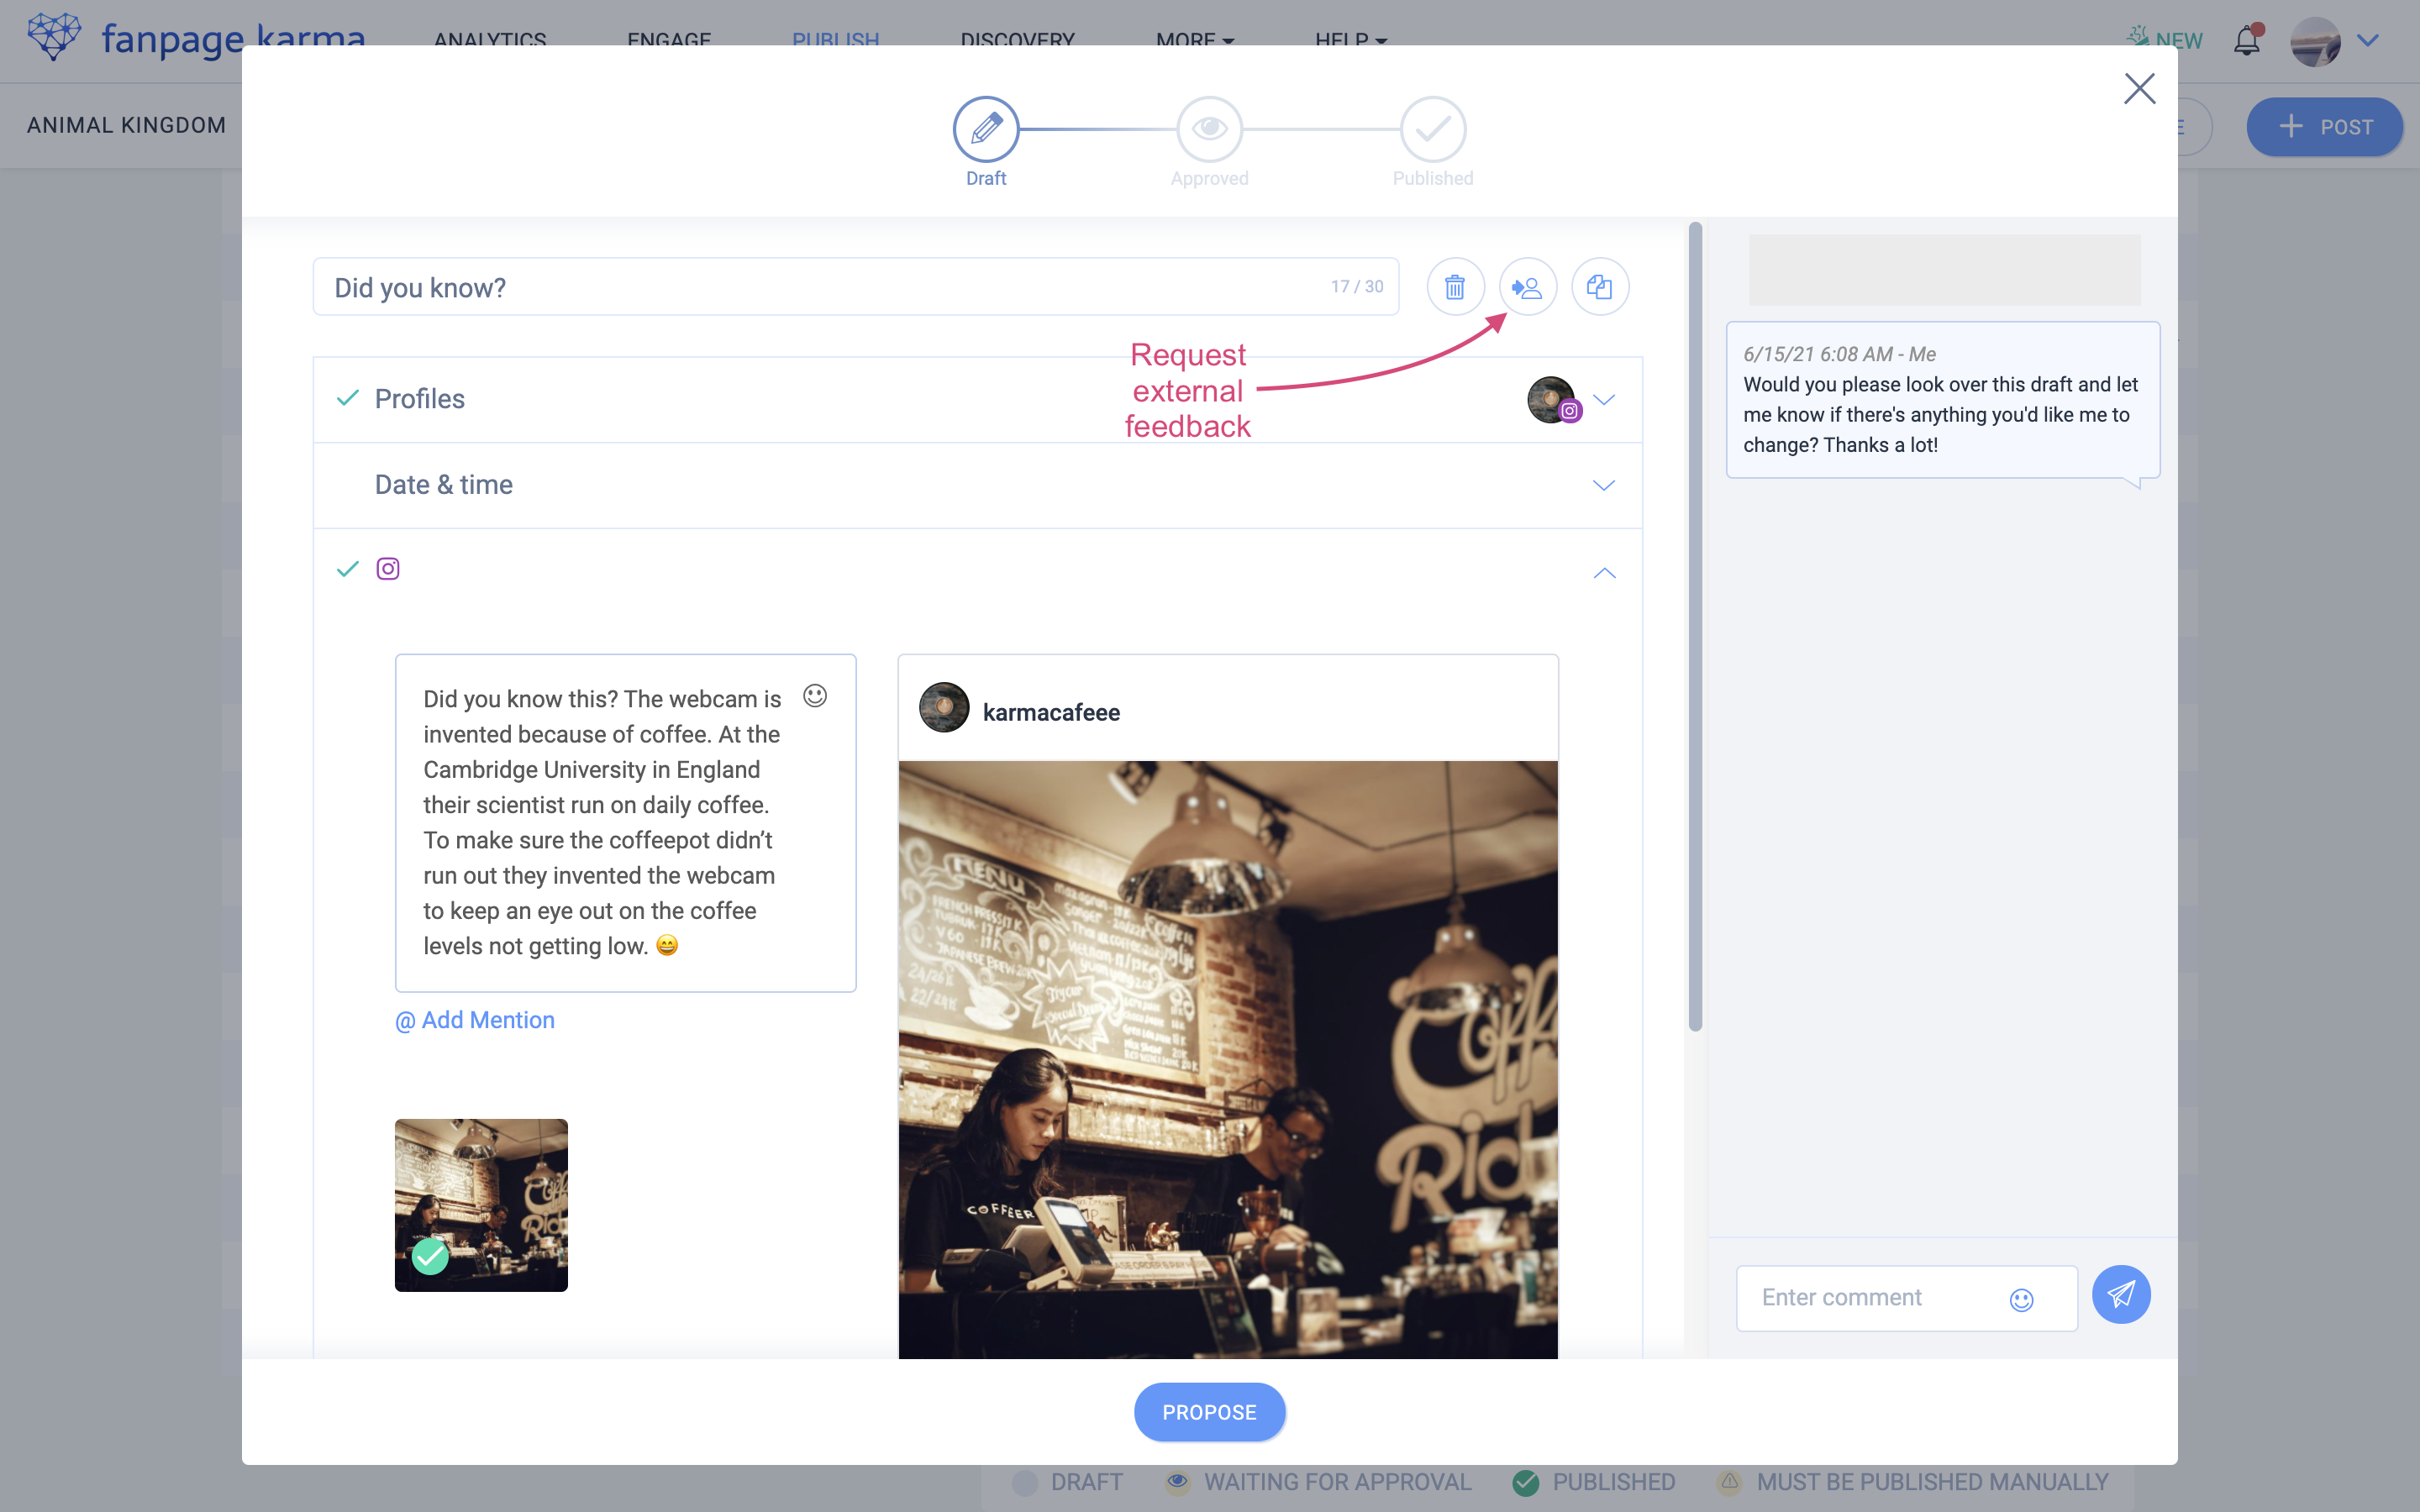
- Open the post draft
2. Click on “Ask for feedback”
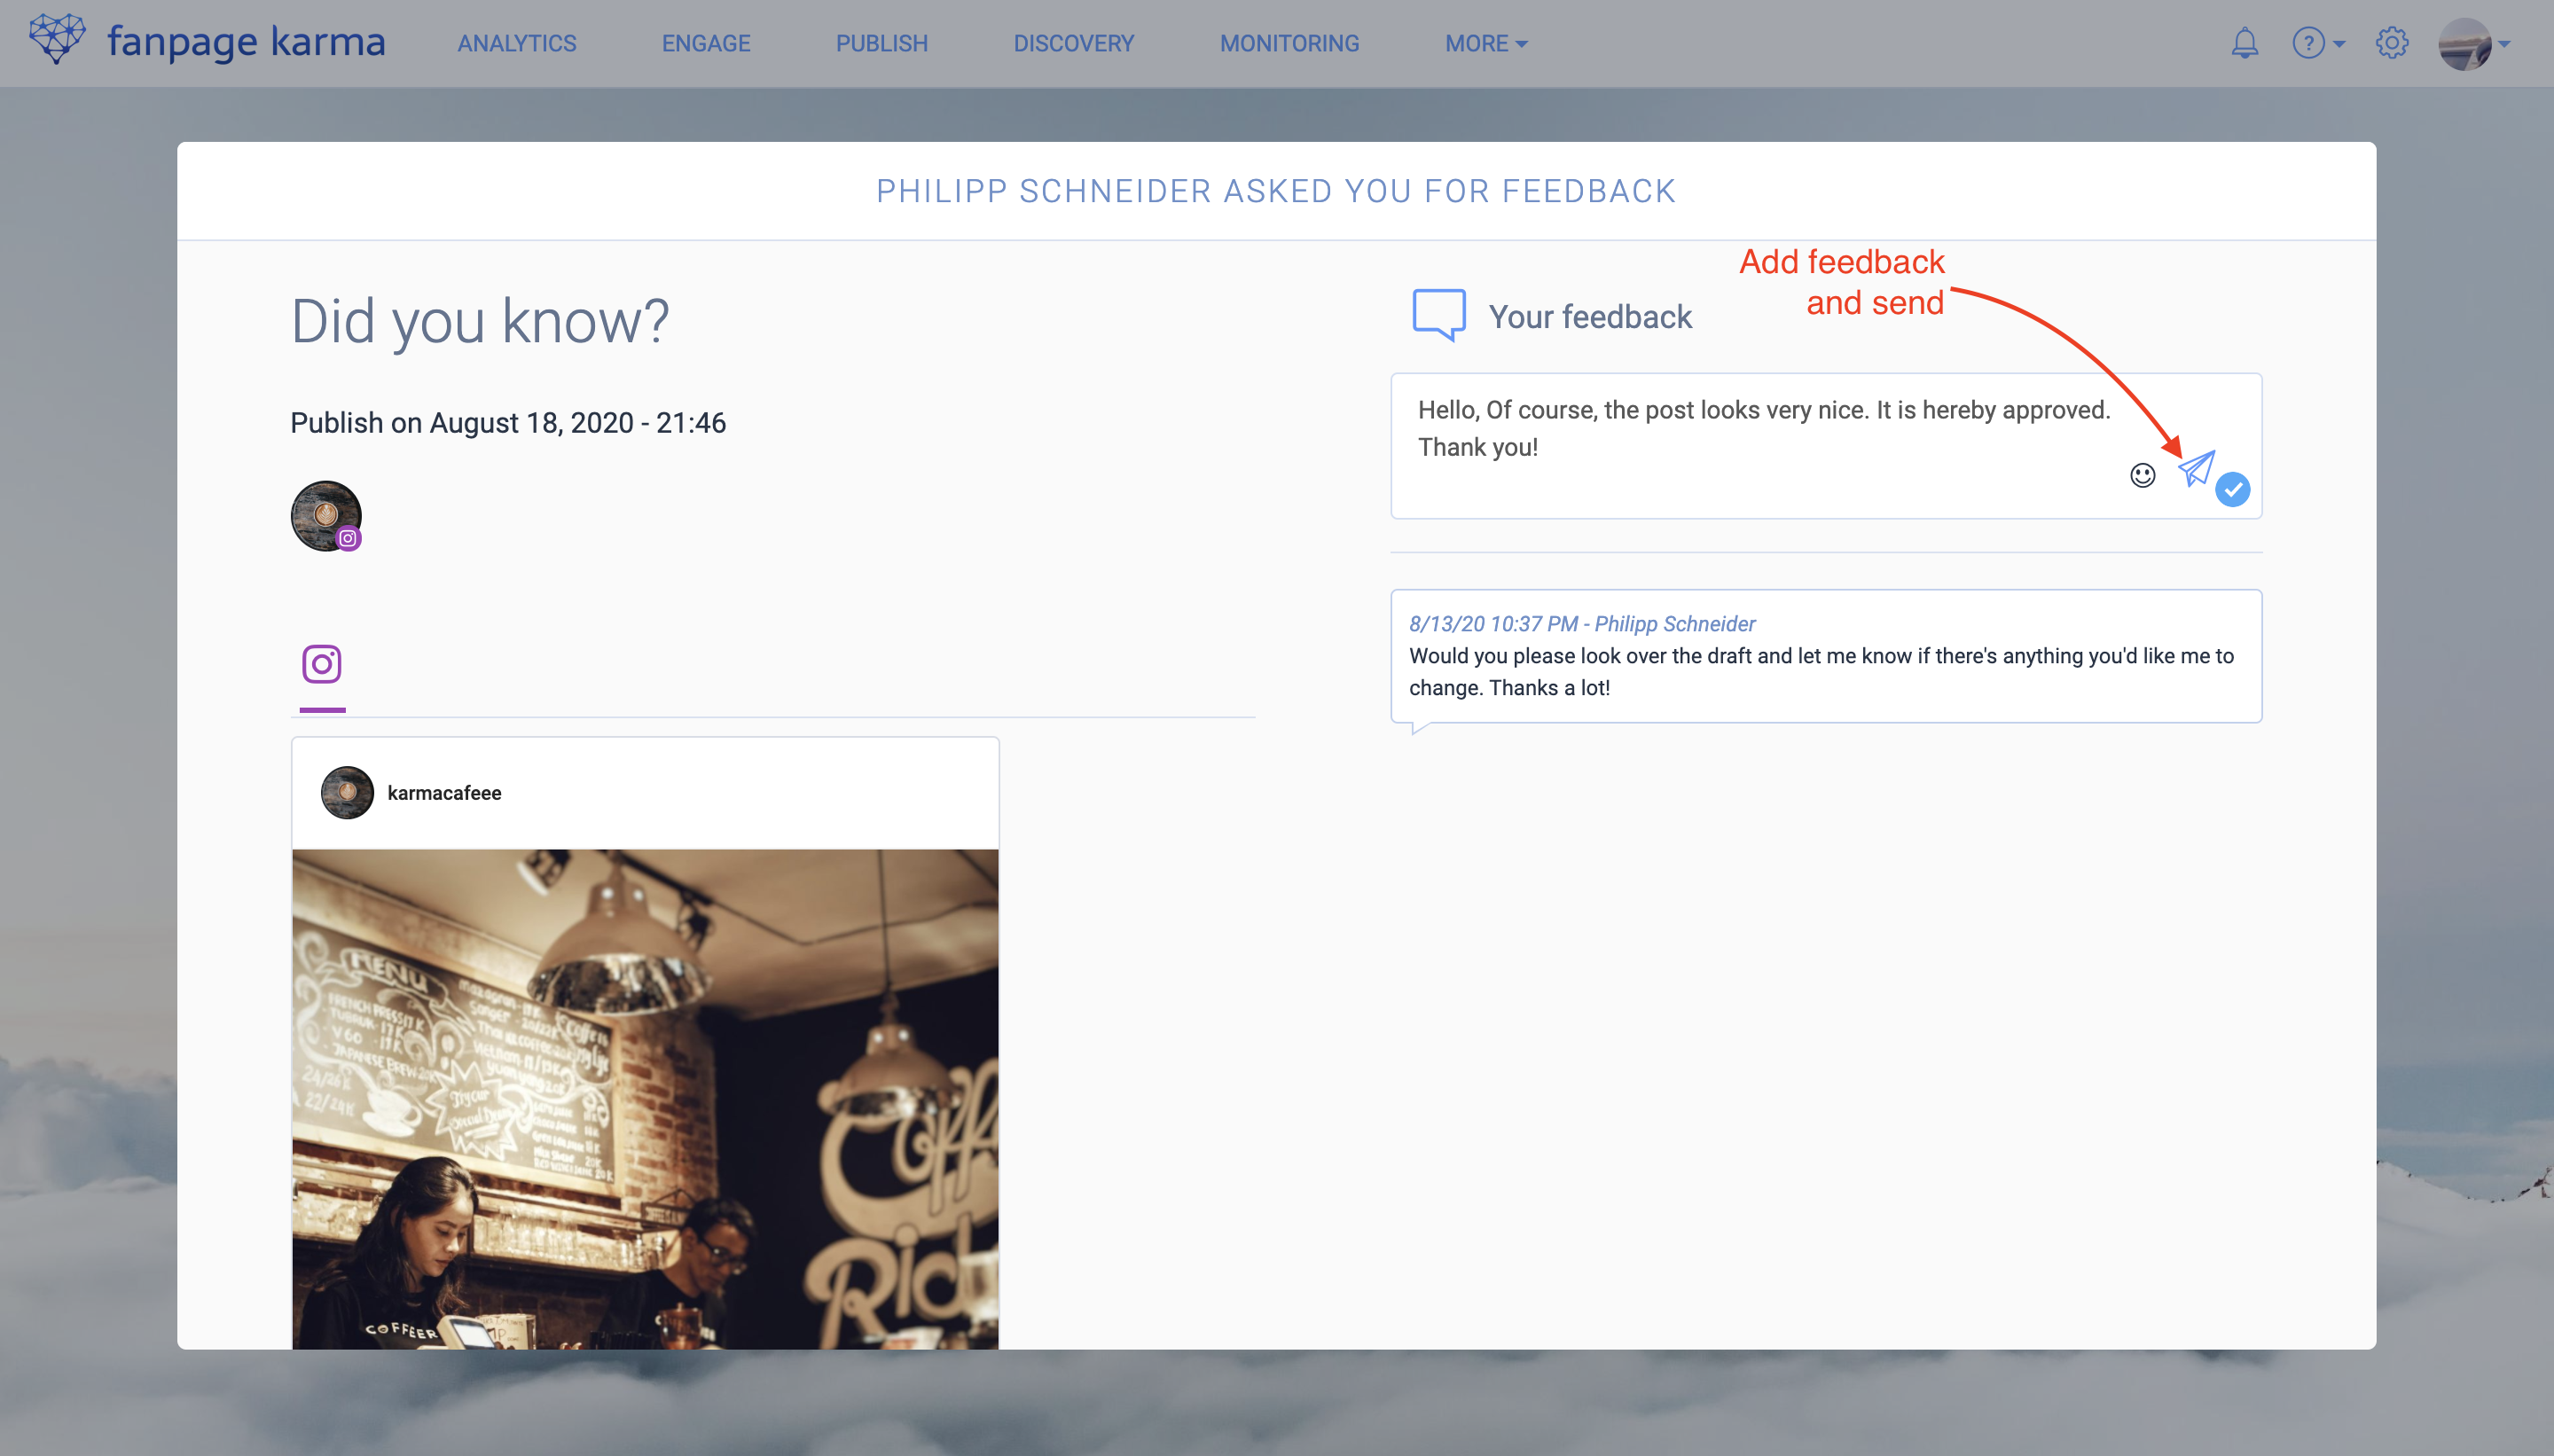
3. Enter your advisor’s data, formulate your question and click “Send” (the question will appear as a comment in the post draft)
4. The advisor receives an e-mail with a link to the post, which he must click
5. The advisor can now examine the post and write and send a response to your question
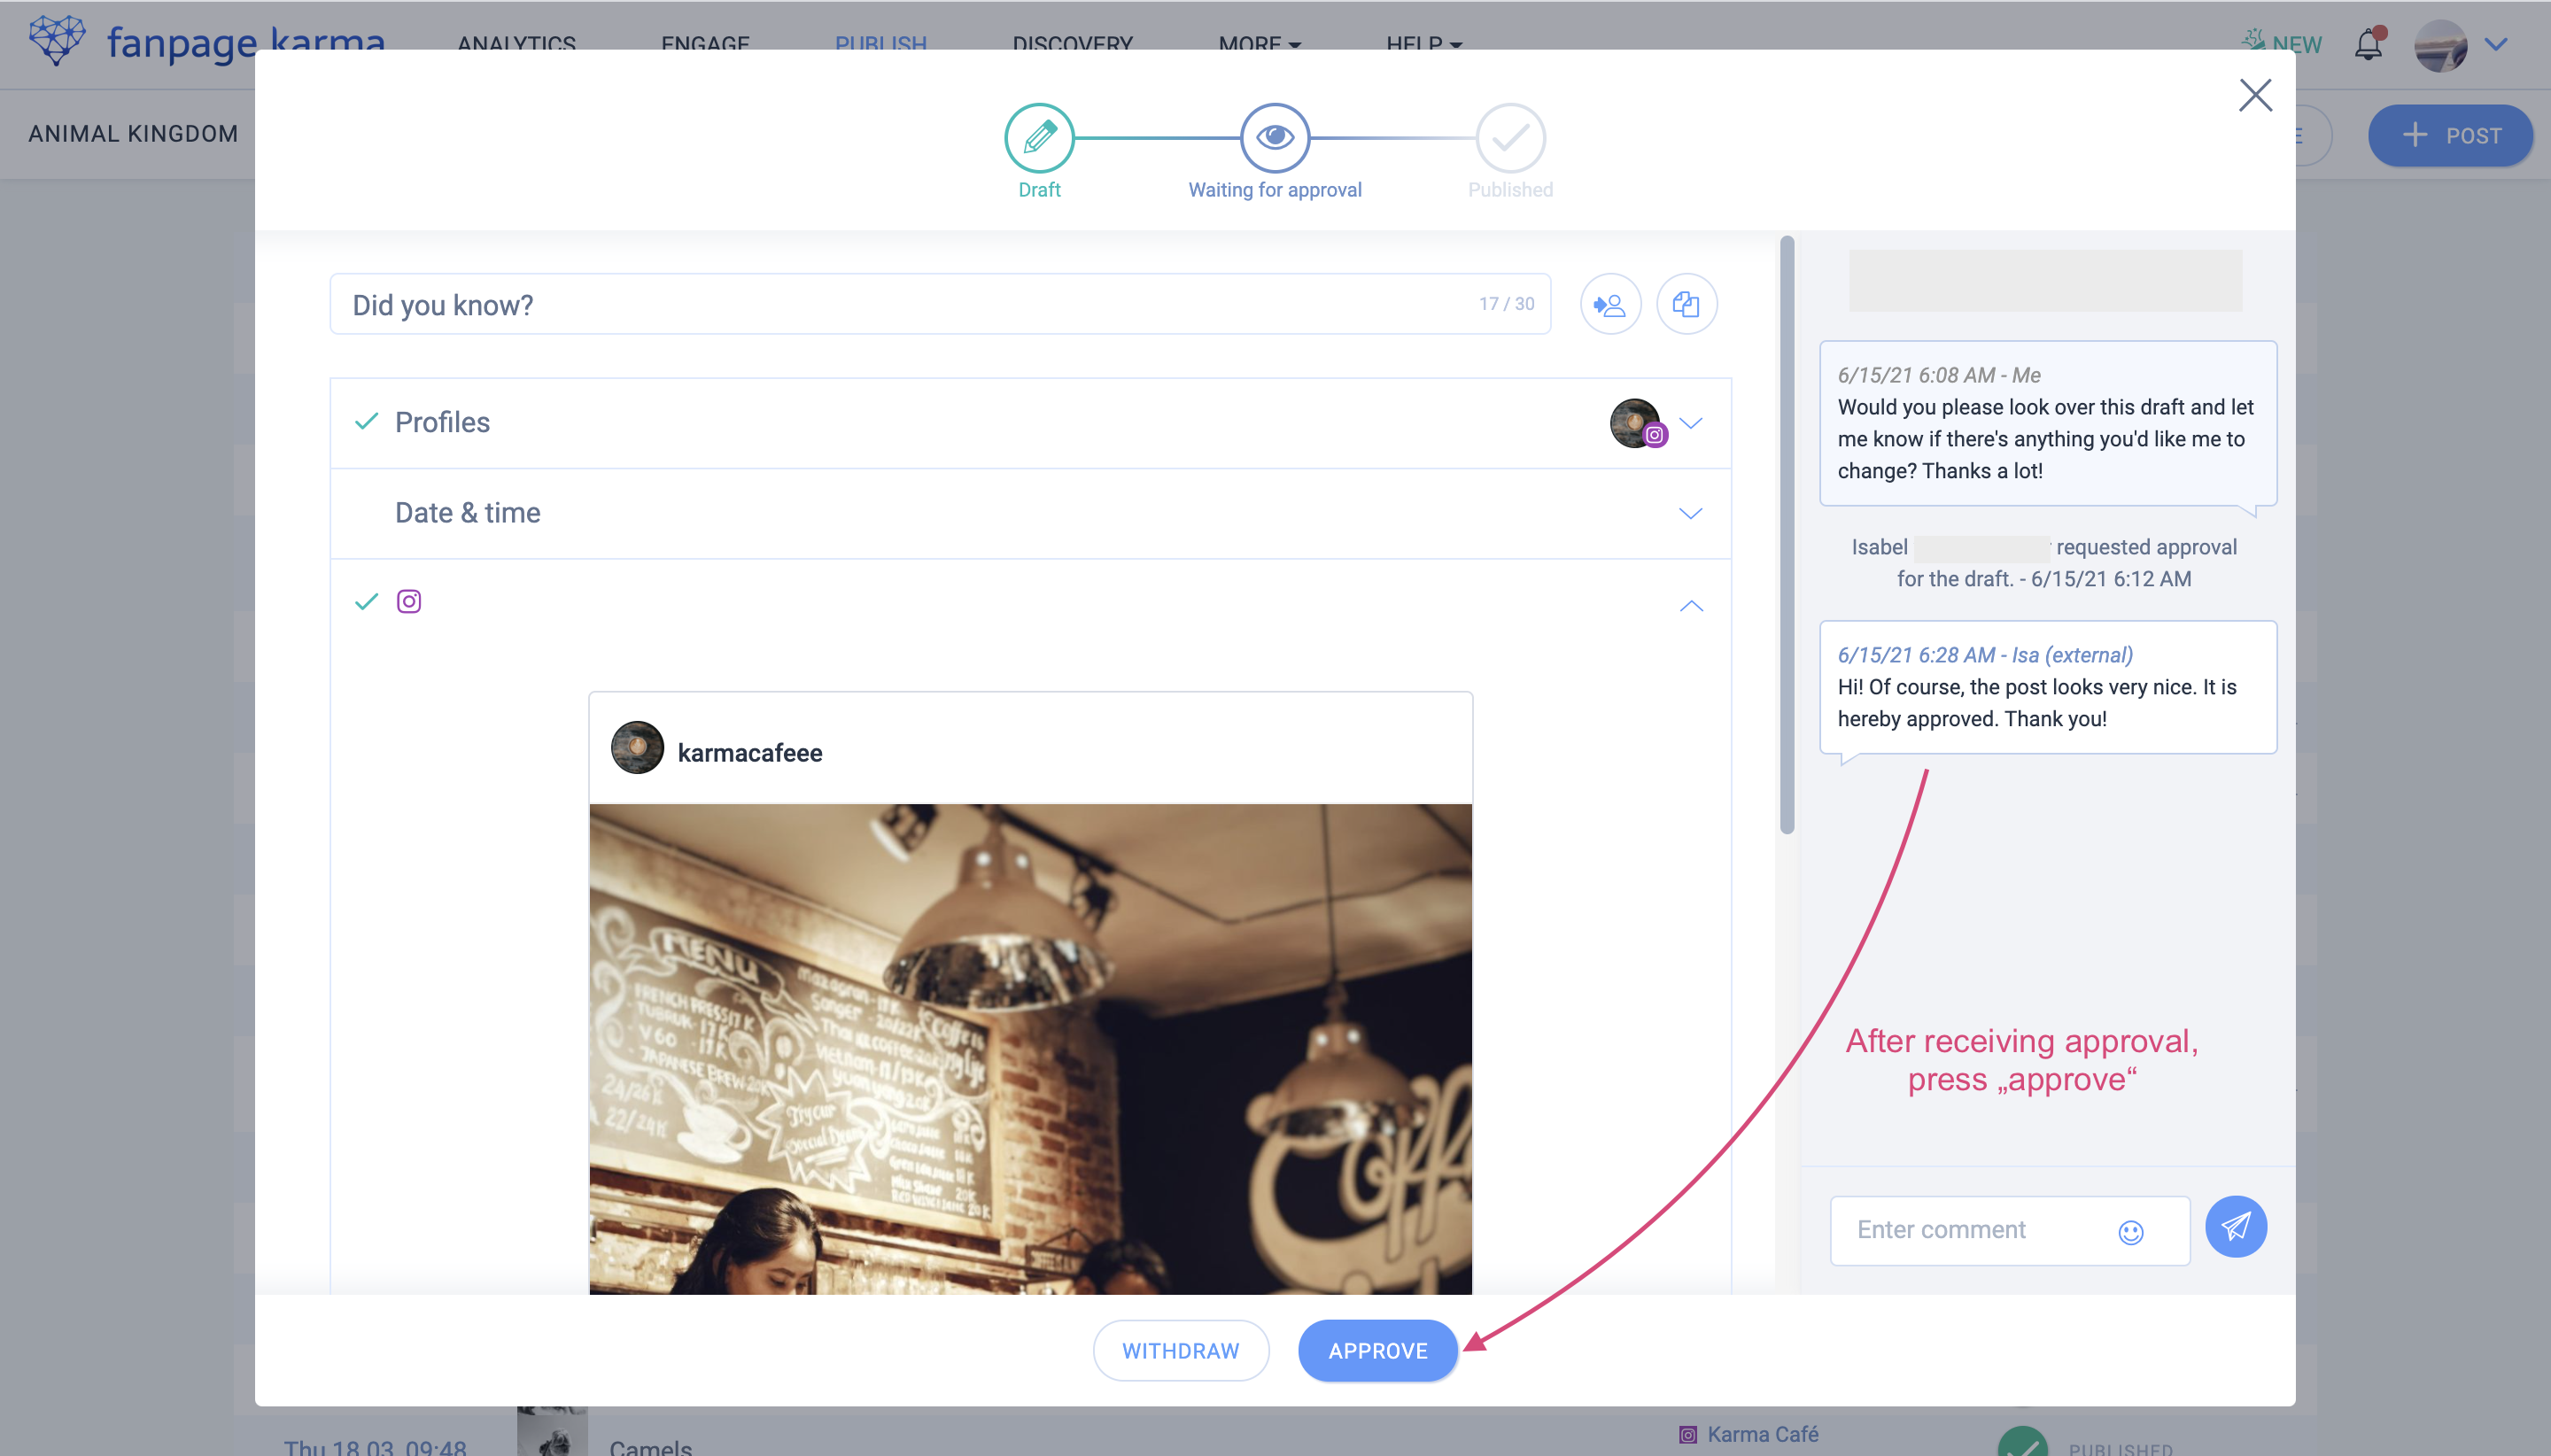
The answer will appear as a comment in the post draft and you will receive a notification under the bell
Now you are informed and can implement the feedback of your consultant.
Now it’s your turn!
You have learned how you and your team can create and publish posts hand in hand. Time to fill the editorial calendar, let’s get going!
Do you have any questions? Then let us know at service@fanpagekarma.com!